
New System Installation
This page explains how to register a new energy storage system with the cloud platform via the Portal and link it to an owner's account.
Prerequisites
Before you start, make sure:
- [ ] Your organisation has an available License bound to it (see 1.3)
- [ ] The device has been wired on site, powered up and connected to the network (wired or Wi-Fi)
- [ ] You have the System SN and Check code from the device nameplate to hand
- [ ] You have the owner's (end user's) email address to hand
Installation Wizard (Maintenance → Install New System)
In the Side Bar, select Maintenance, then Install New System. The wizard has three steps: Basic Information → System Settings → Installed.
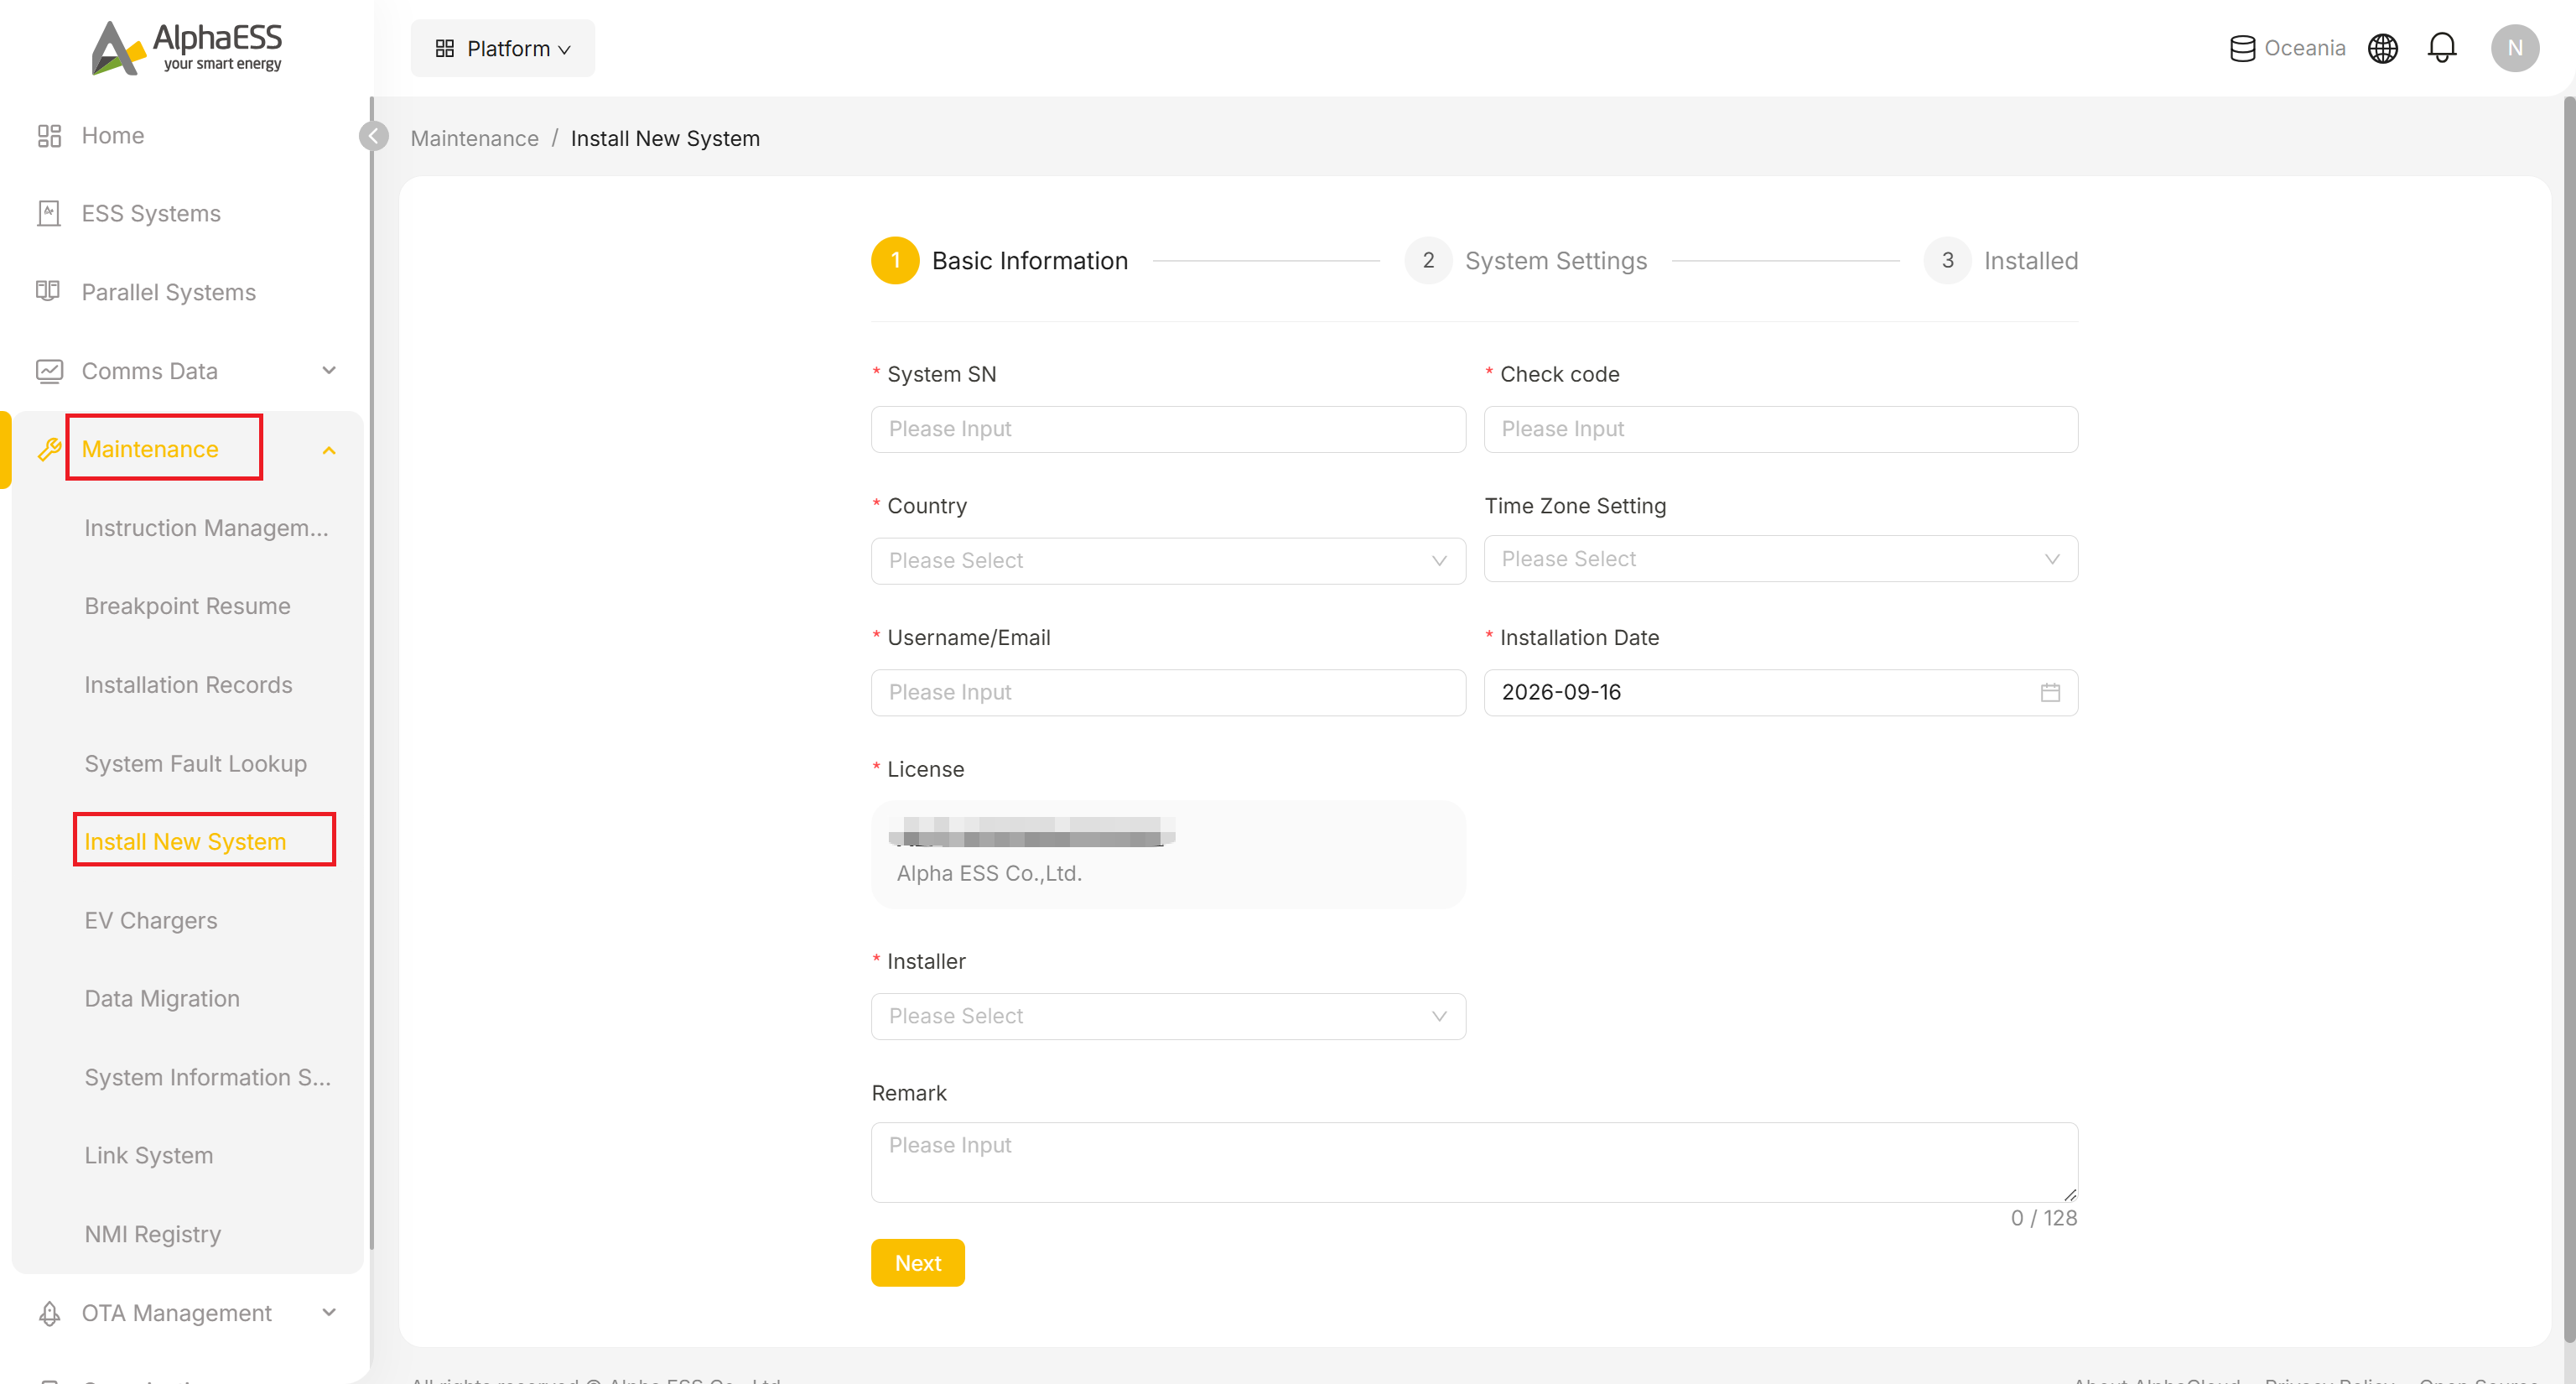
Fill in Step 1: Basic Information:
Field Description System SN * Device serial number, shown on the nameplate Check code * The check code paired with the SN, shown on the nameplate Country * The country of installation (dropdown; determines compliance configuration and safety standards) Time Zone Setting Time zone (dropdown, optional; affects tariff periods and the time axis on curves) Username/Email * The owner's email: the owner uses it to sign in to the AlphaESS App / Portal C-side to view their own system Installation Date * Installation date (defaults to today) License * Click to select from the Licences bound to your organisation — the field may show an example value before you pick one, so make sure you actually select an entry rather than leaving it as-is Installer * Select the member carrying out this installation from the dropdown Remark Notes (≤128 characters, with a live character count), such as the customer's name and a short site name All fields marked with an asterisk are required — the wizard validates them and shows an inline error (e.g. "Please enter Country") if you try to proceed with one missing.
Click Next to go to Step 2: System Settings. These fields vary by device model and only appear once the System SN and Check code have passed validation, so they are not covered field-by-field here — follow what is shown on screen for your specific model. They typically cover:
- Safety standards
- Grid-connection parameters
- CT / meter settings
After confirming everything is correct, submit to reach Step 3: Installed — the wizard's completion page.
💡 Tip: If the SN + Check code fails validation, check the characters on the nameplate (watch out for 0/O and 1/I); if it still fails, the device may not be registered in the system or may already be linked — contact your distributor or AlphaESS support.
Installation Records (Maintenance → Installation Records)
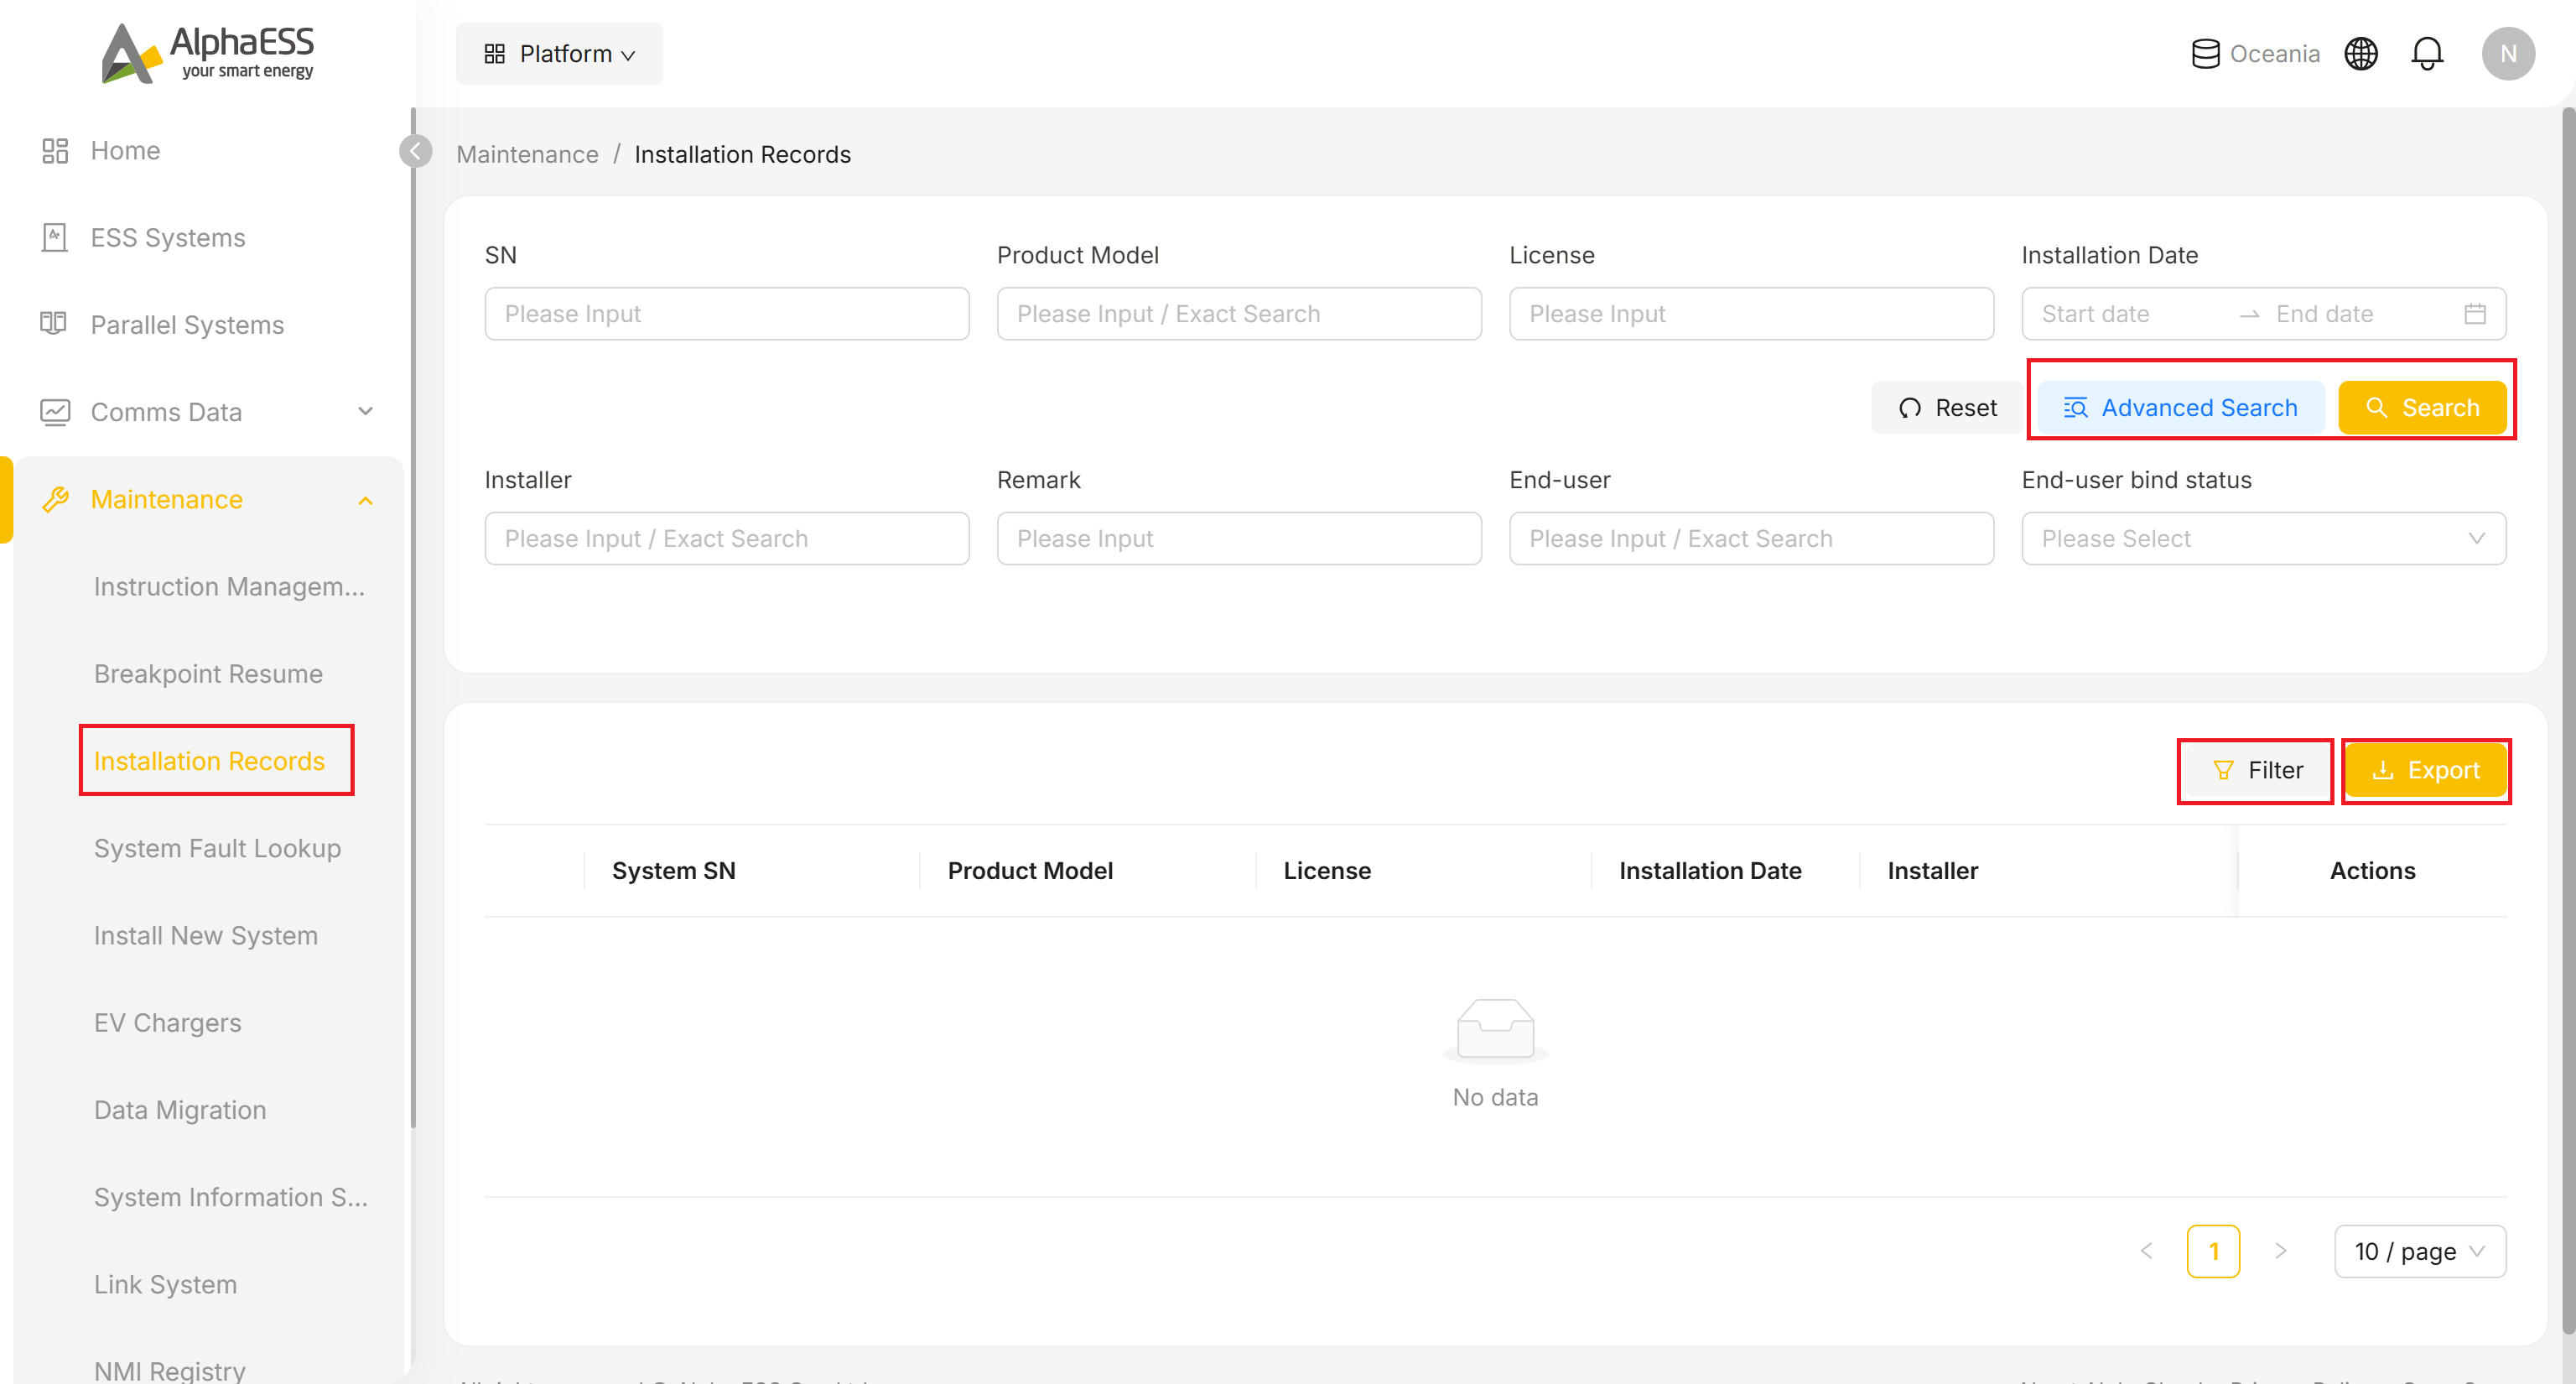
- In the Side Bar, select Maintenance, then Installation Records to search the full installation history.
- Search by SN, Product Model, License or an Installation Date range, or click Advanced Search for more options.
- Click Filter above the table to choose which extra columns are shown (Installer, Remark, End-user, End-user bind status) — this is separate from the search fields above and only controls what the table displays.
- Click Export to download the current list.
The table's default columns are System SN / Product Model / License / Installation Date / Installer, plus an Actions column.
Post-Installation Checklist
- [ ] The SN can be found under ESS Systems with the status Normal (see 3.1 Daily Monitoring)
- [ ] The plant overview shows live power data (Solar / Battery / Home / Grid)
- [ ] The owner can now sign in to the AlphaESS App with their email and see the system