

Remote Configuration
There are two layers of settings on the device details page: Site → Settings (the usage strategies the owner also sees, e.g. in the AlphaESS App) and the System Settings tab (device-level parameters). This page walks through both, step by step.
⚠️ Note: Remote changes are pushed to the device in real time and affect the owner's Profit and day-to-day experience. Confirm the operating conditions before making changes, and for anything significant it is best to speak with the owner first.
Site → Settings (usage strategies)
Open a device details page, go to the Site tab, then the Settings sub-tab. Not every system has every group below — what you see depends on the device model, region and your account role.
Battery SOC settings
Click Battery SOC settings to expand it.
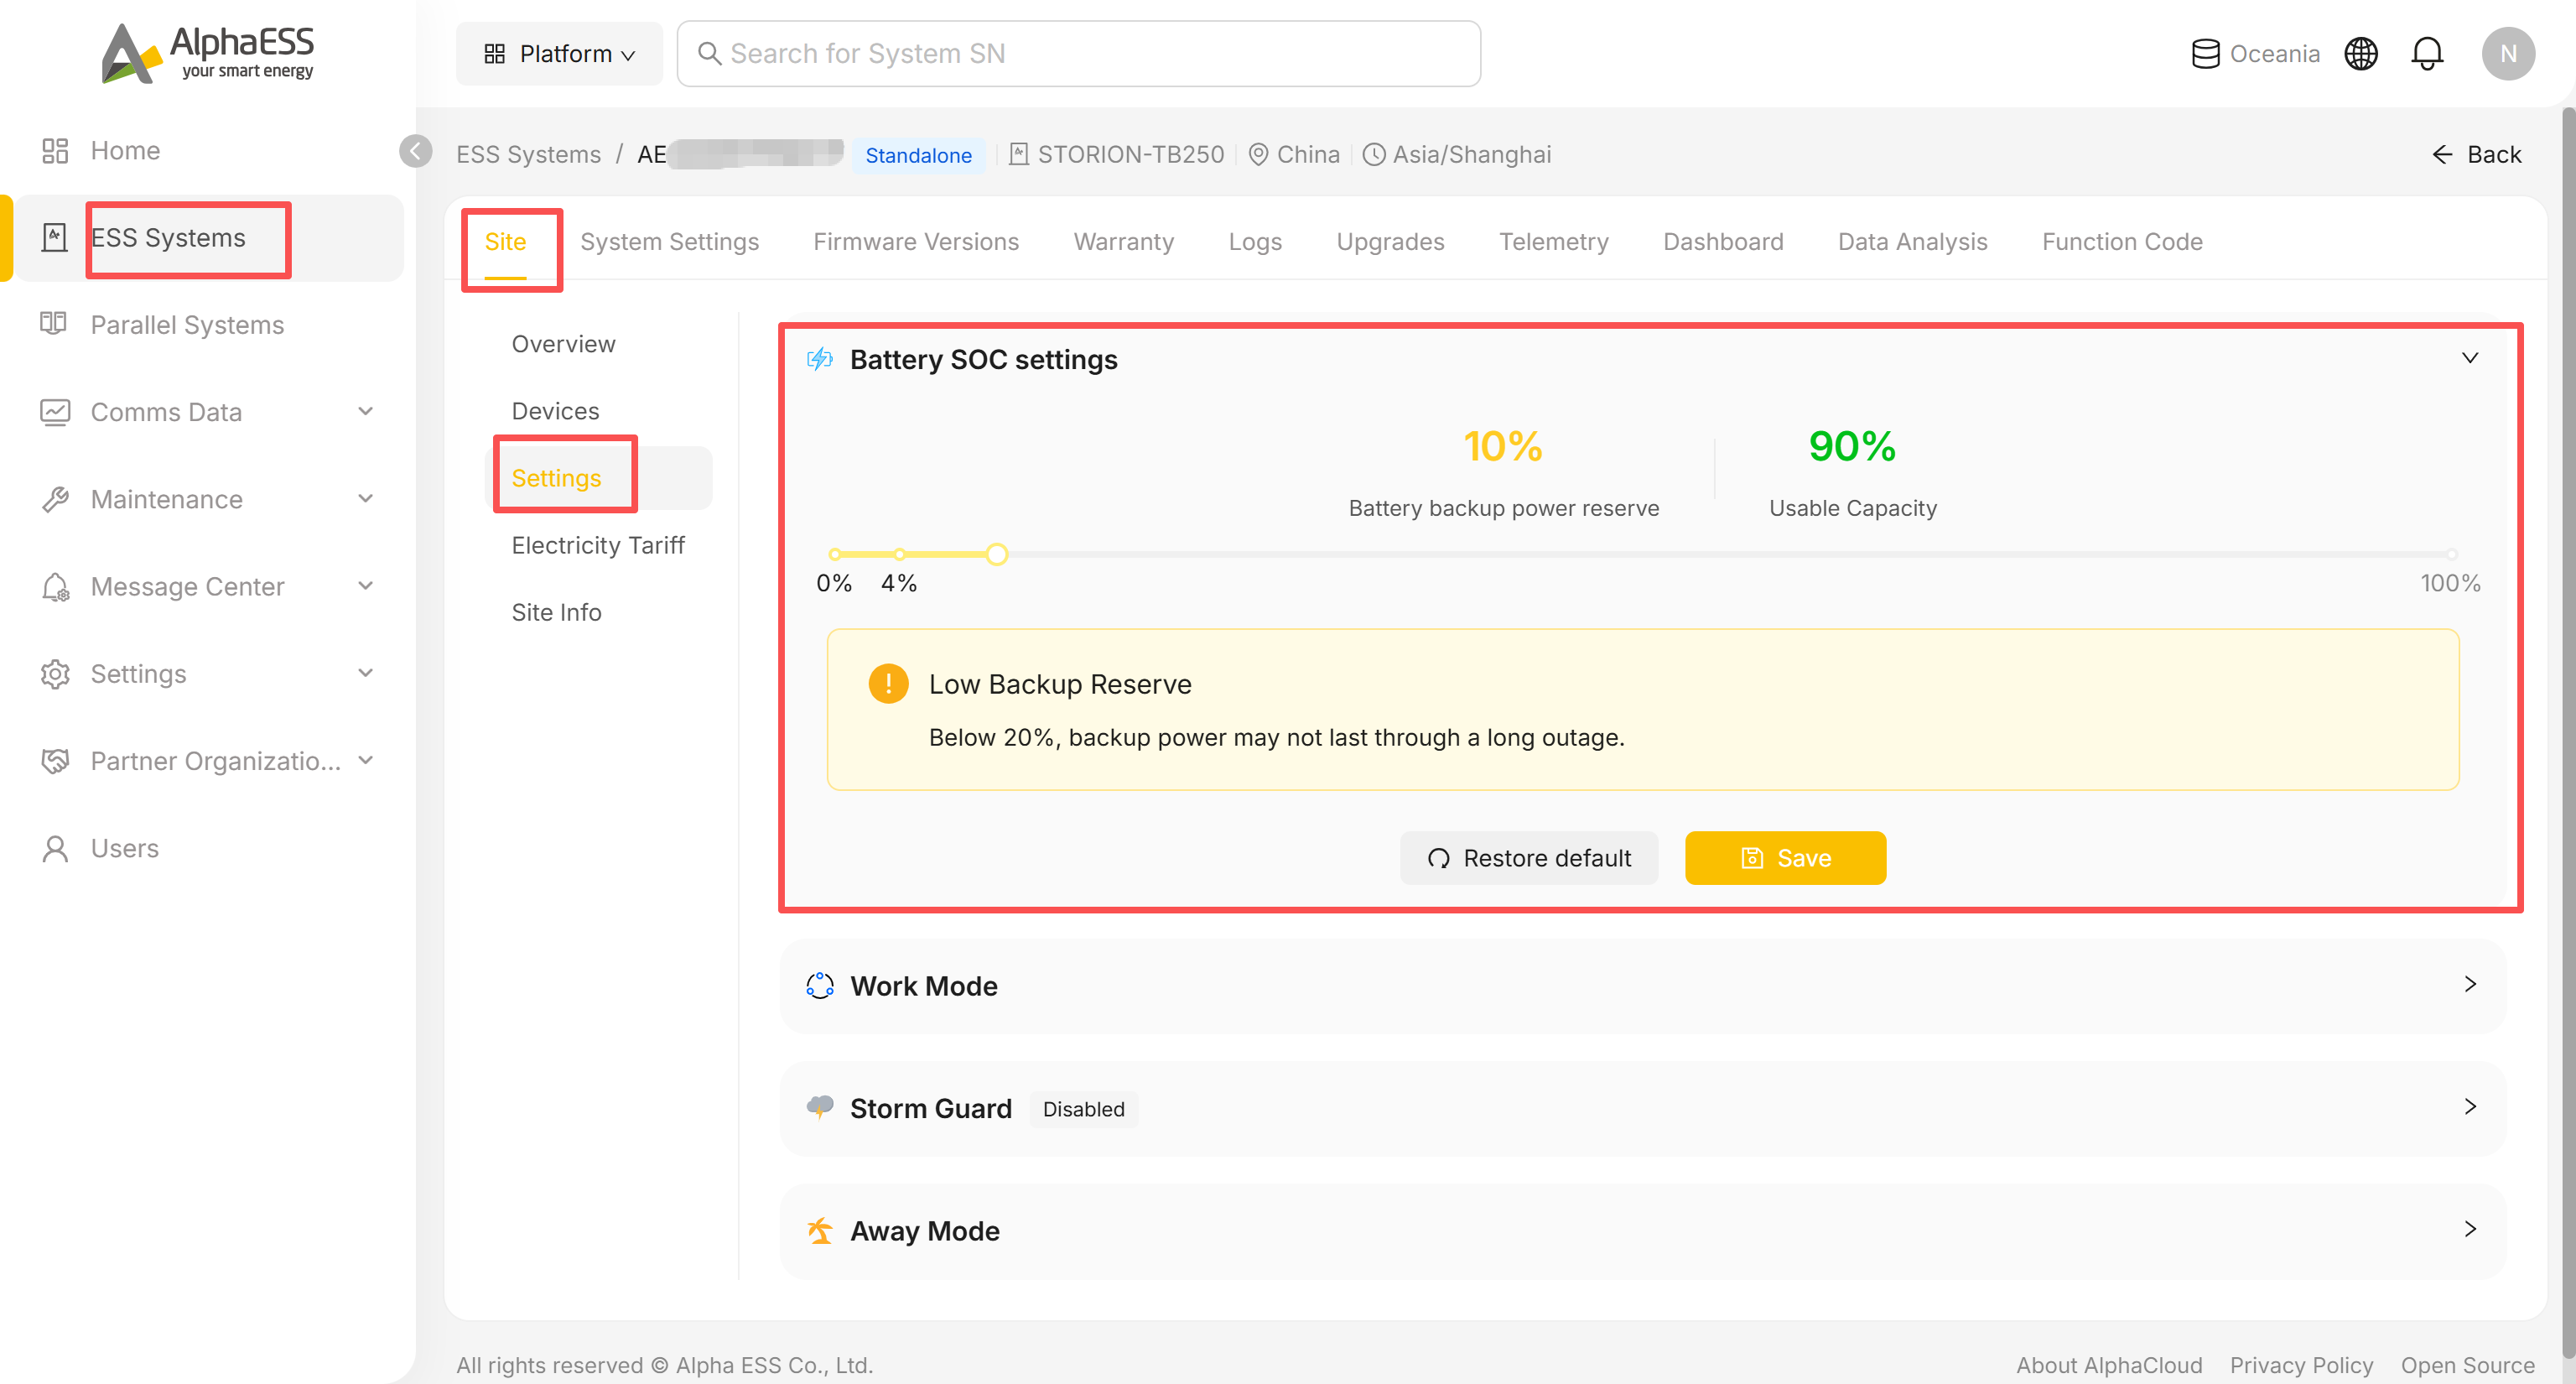
- Drag the slider (or the handle) to set the Battery backup power reserve — the minimum SOC the battery keeps in hand for backup.
- Usable Capacity updates automatically (Usable Capacity = 100% − reserve).
- If you set the reserve below 20%, a Low Backup Reserve warning appears: "Below 20%, backup power may not last through a long outage." — it's a warning, not a hard block, but check with the owner before leaving it that low.
- Click Save to apply, or Restore default to reset to the factory value.
Work Mode
Click Work Mode to expand it. Depending on the device, you'll see two or more mode cards; Self-Consumption is always the default.
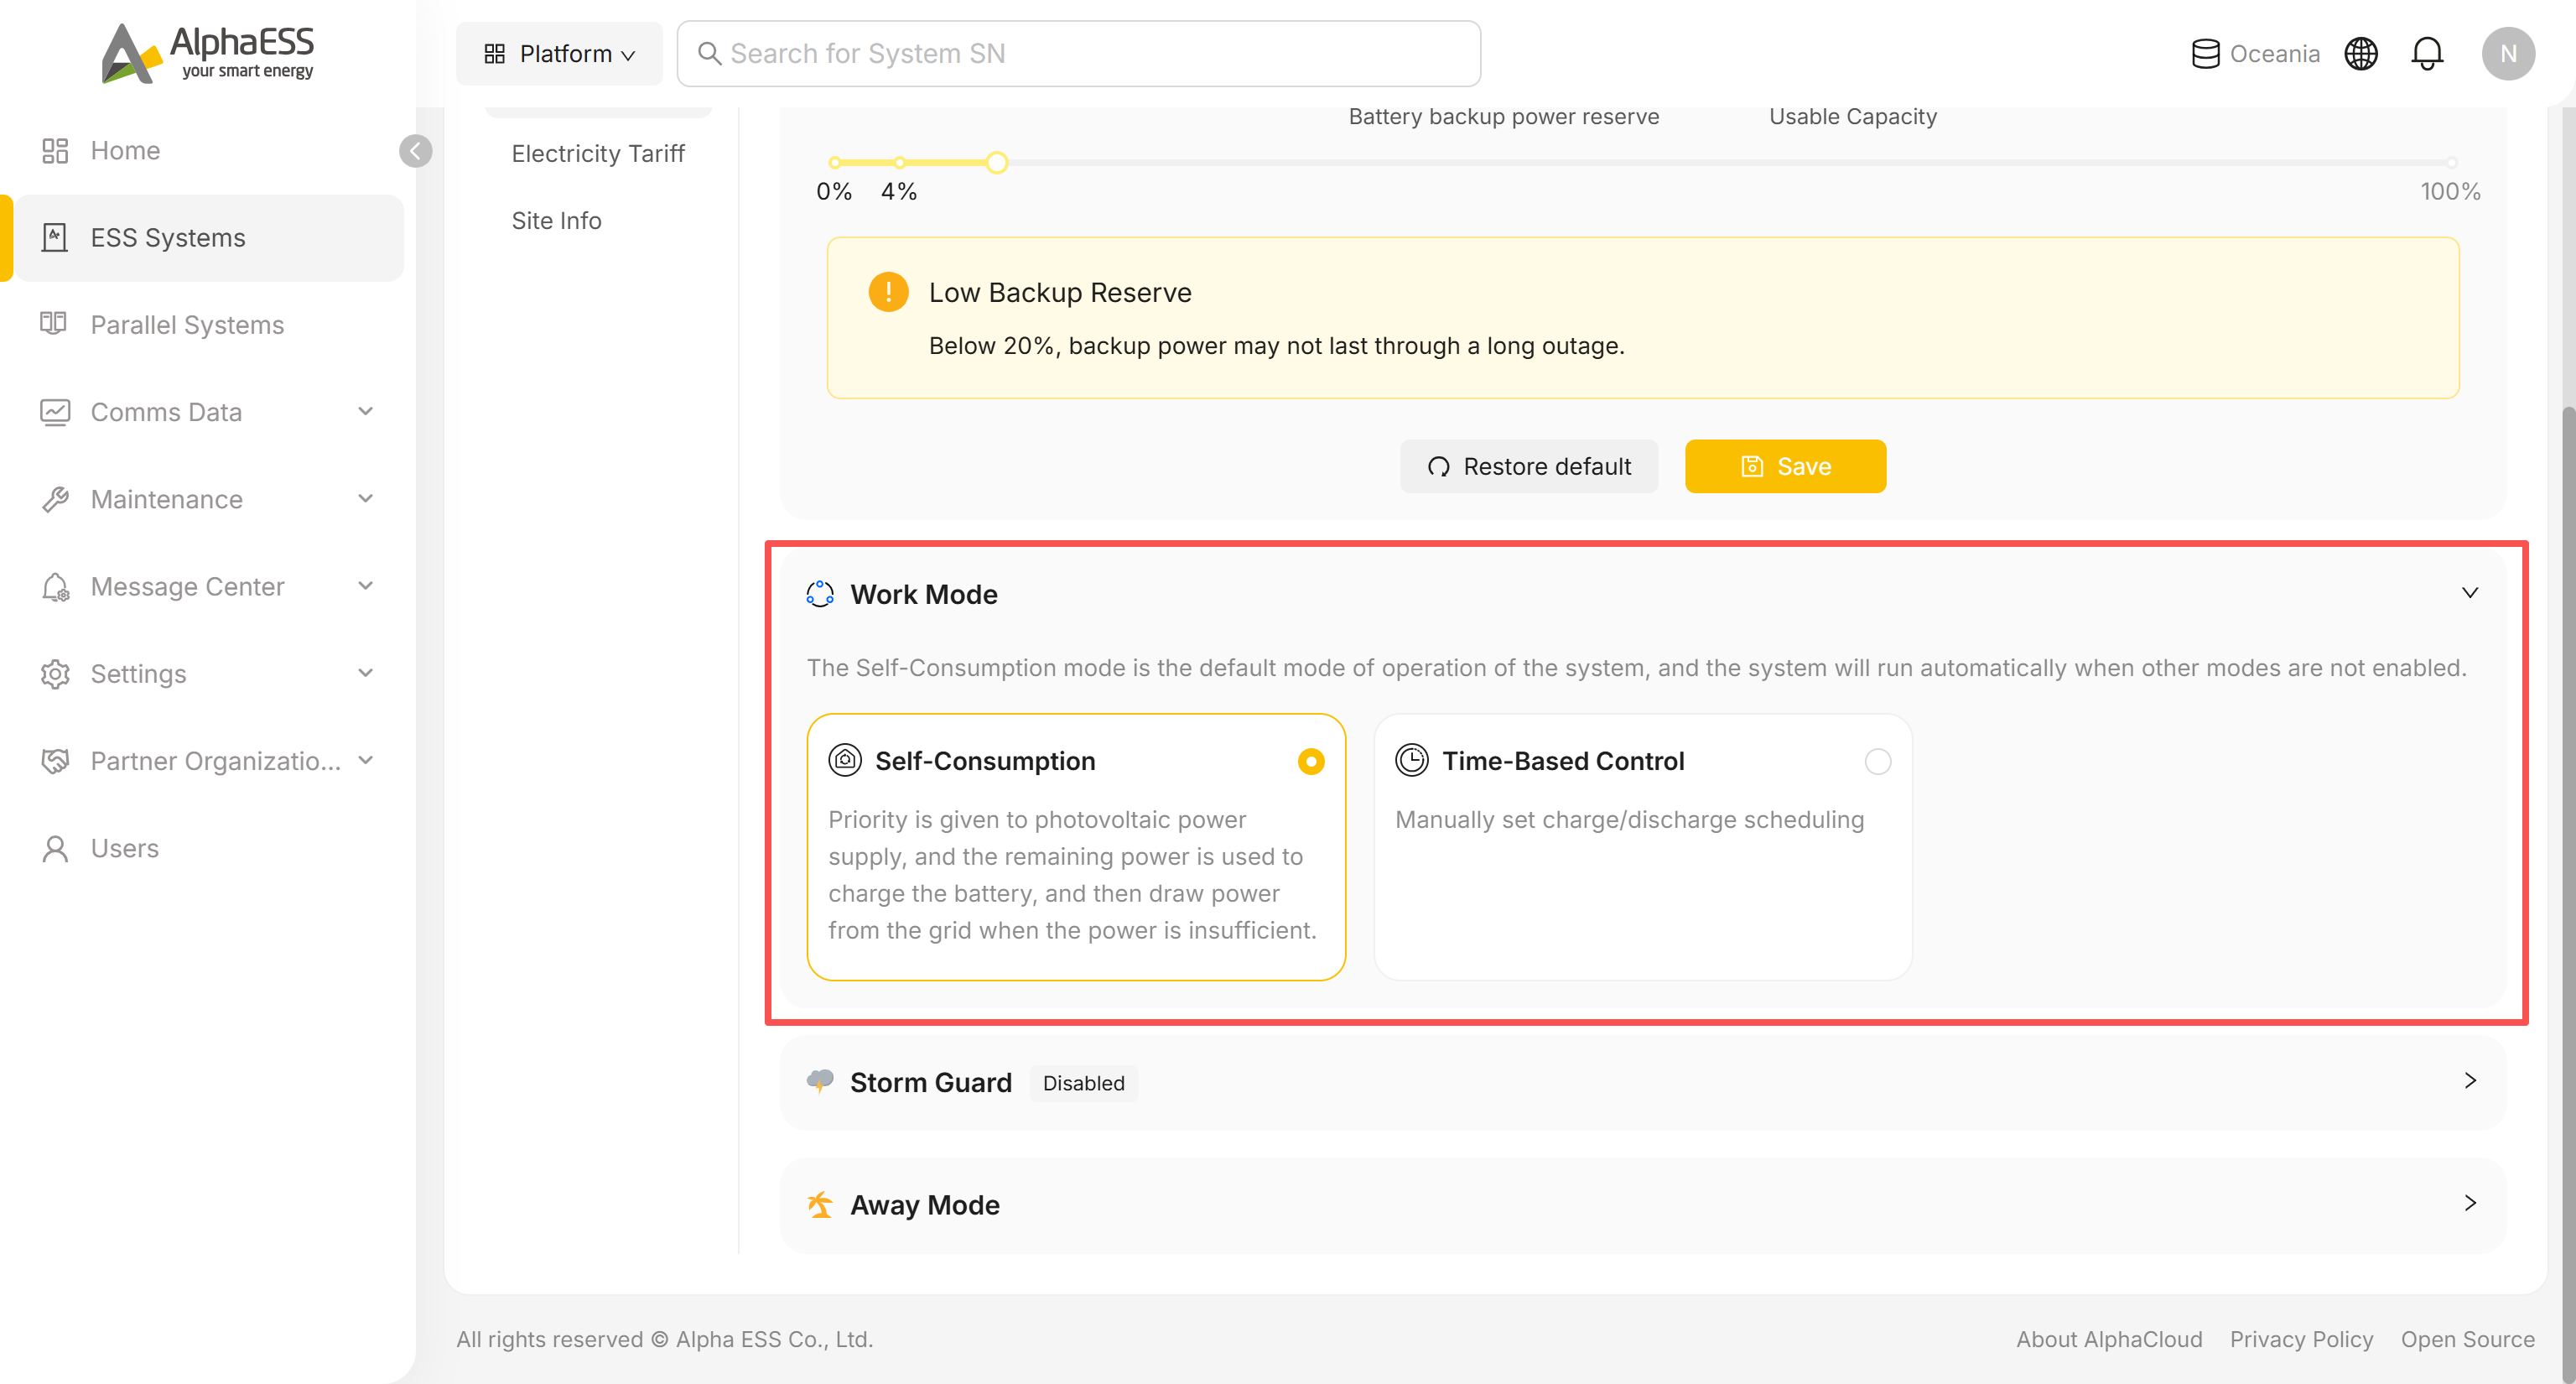
Self-Consumption: solar power is used on-site first, surplus charges the battery, and the grid only tops up when both are insufficient. No further configuration needed.
Time-Based Control: select this card to open the Charge/Discharge Schedule panel:
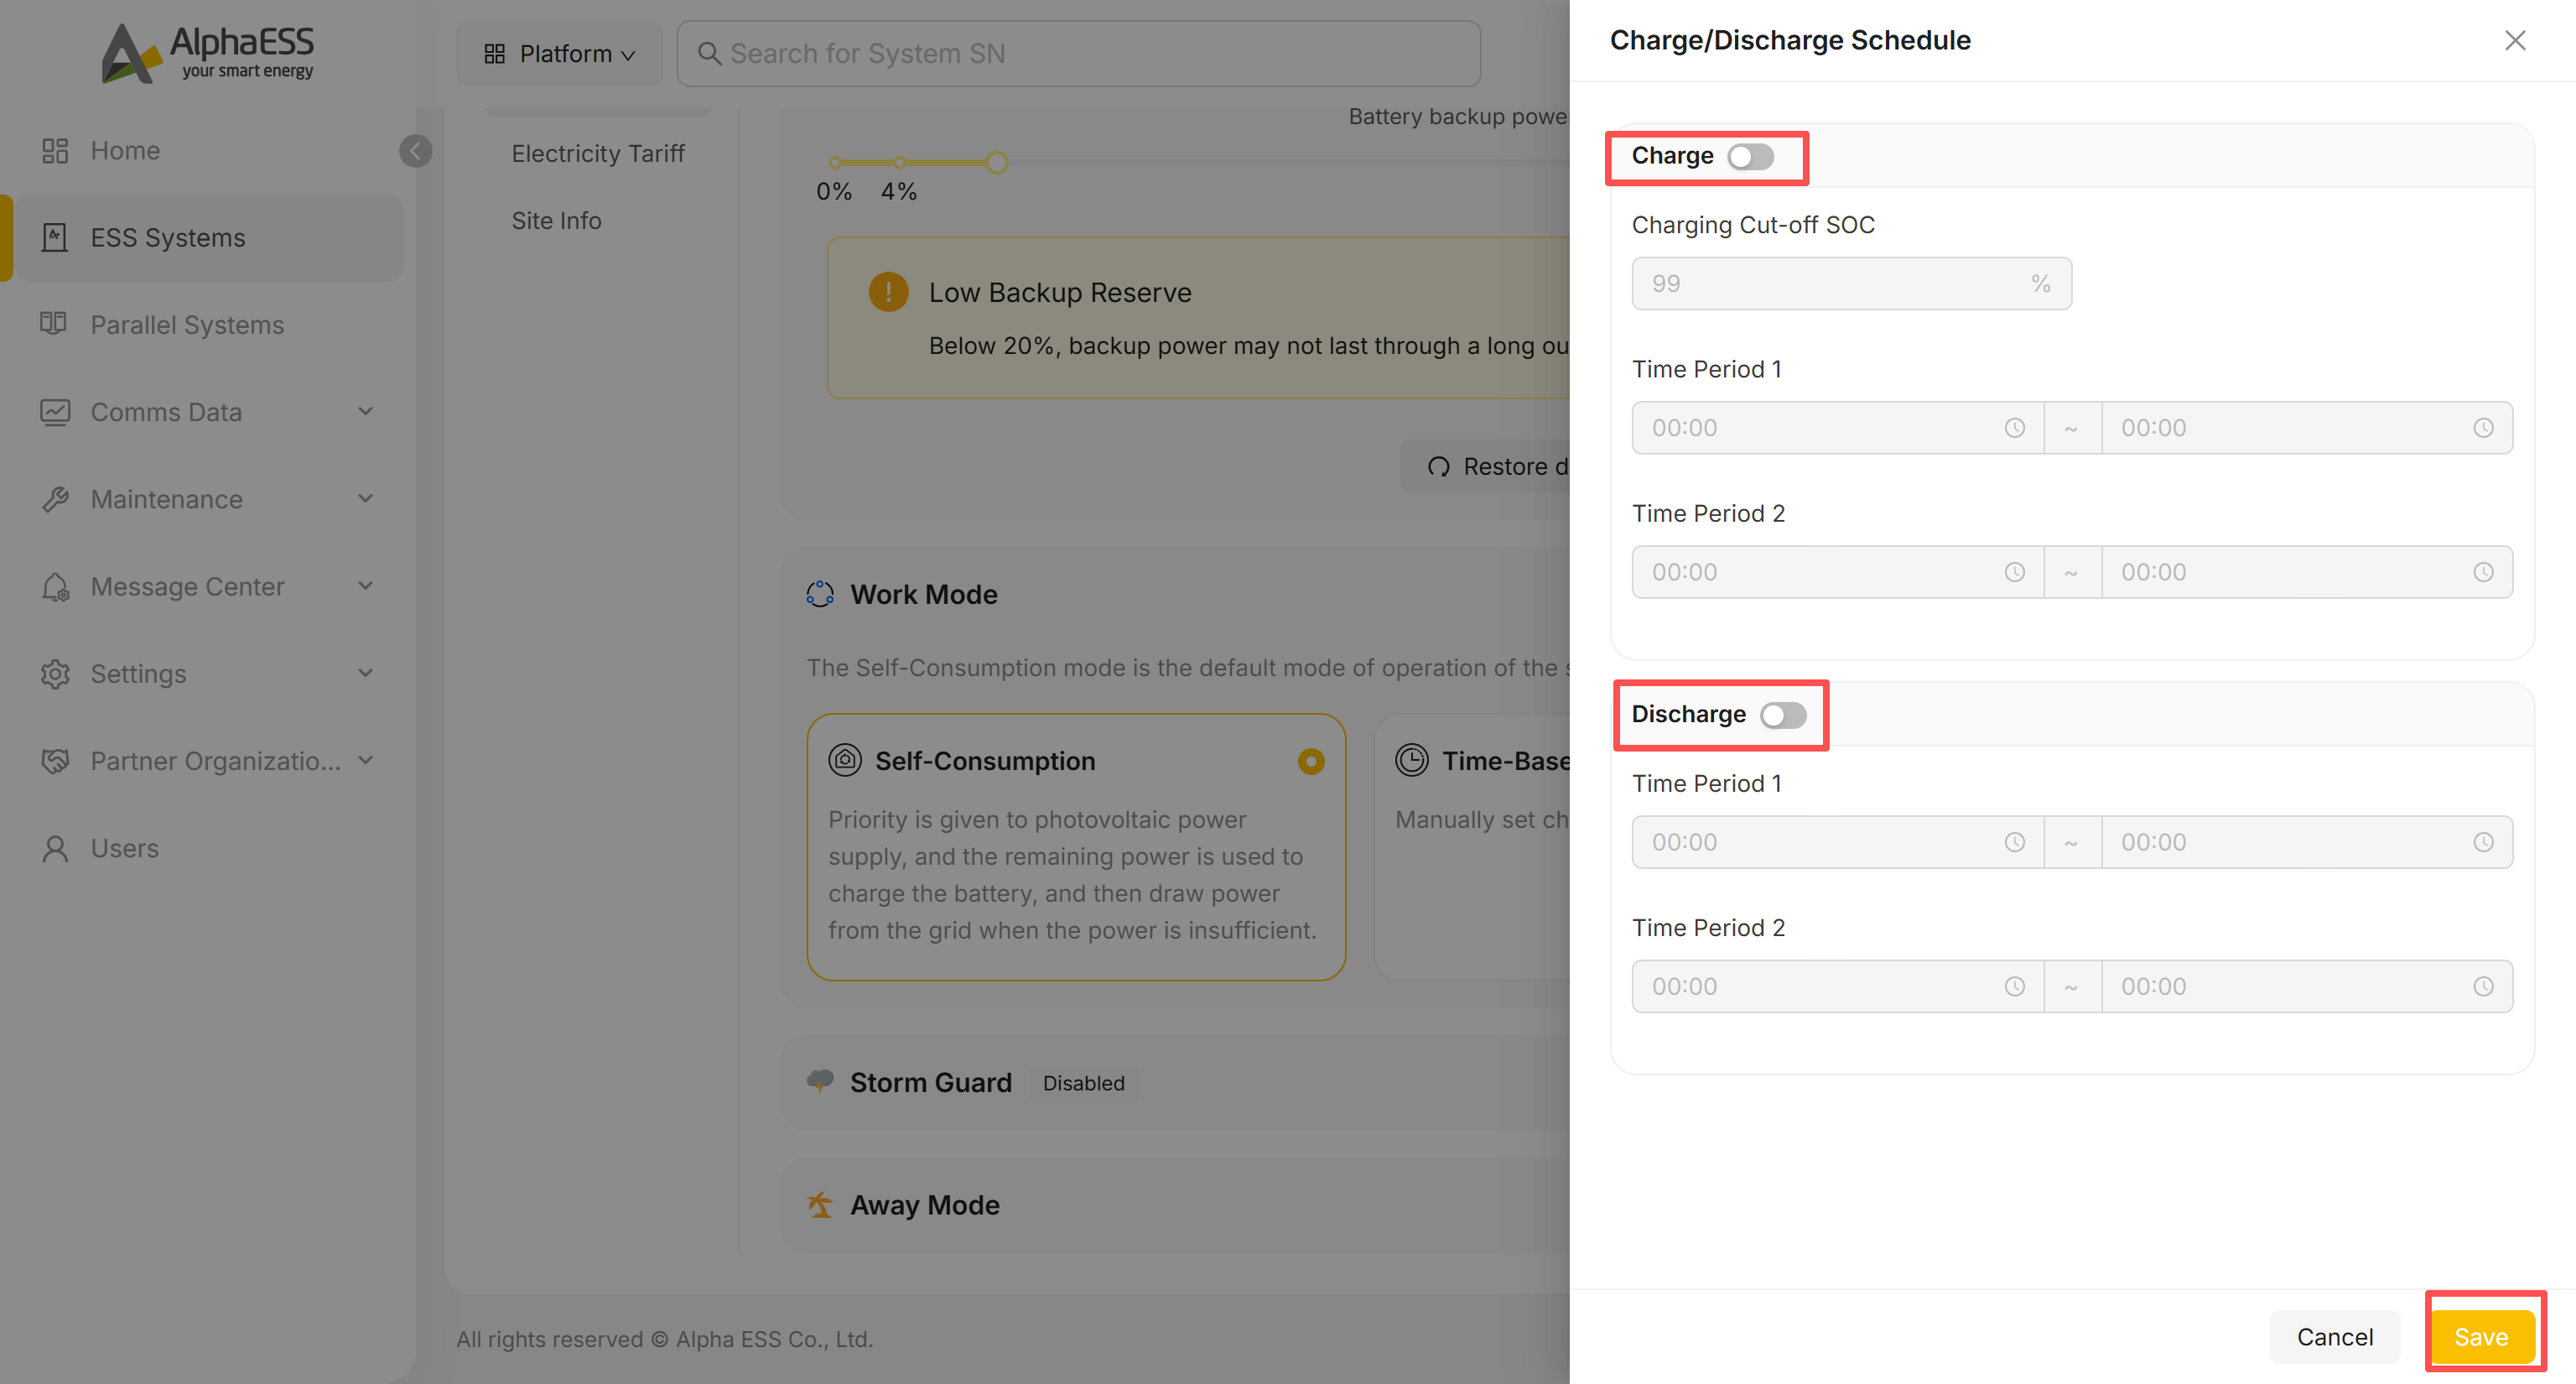
- Turn on the Charge switch to enable scheduled charging, then set the Charging Cut-off SOC (%) and up to two Time Period windows (start ~ end).
- Turn on the Discharge switch the same way, with its own cut-off/time-period fields.
- Click Save to apply. Leaving a switch off keeps that side inactive even if times are filled in.
Some models expose additional work modes (e.g. tariff-based scheduling) — the available cards and their labels follow what the device supports.
Storm Guard
Click Storm Guard to expand it (disabled by default).
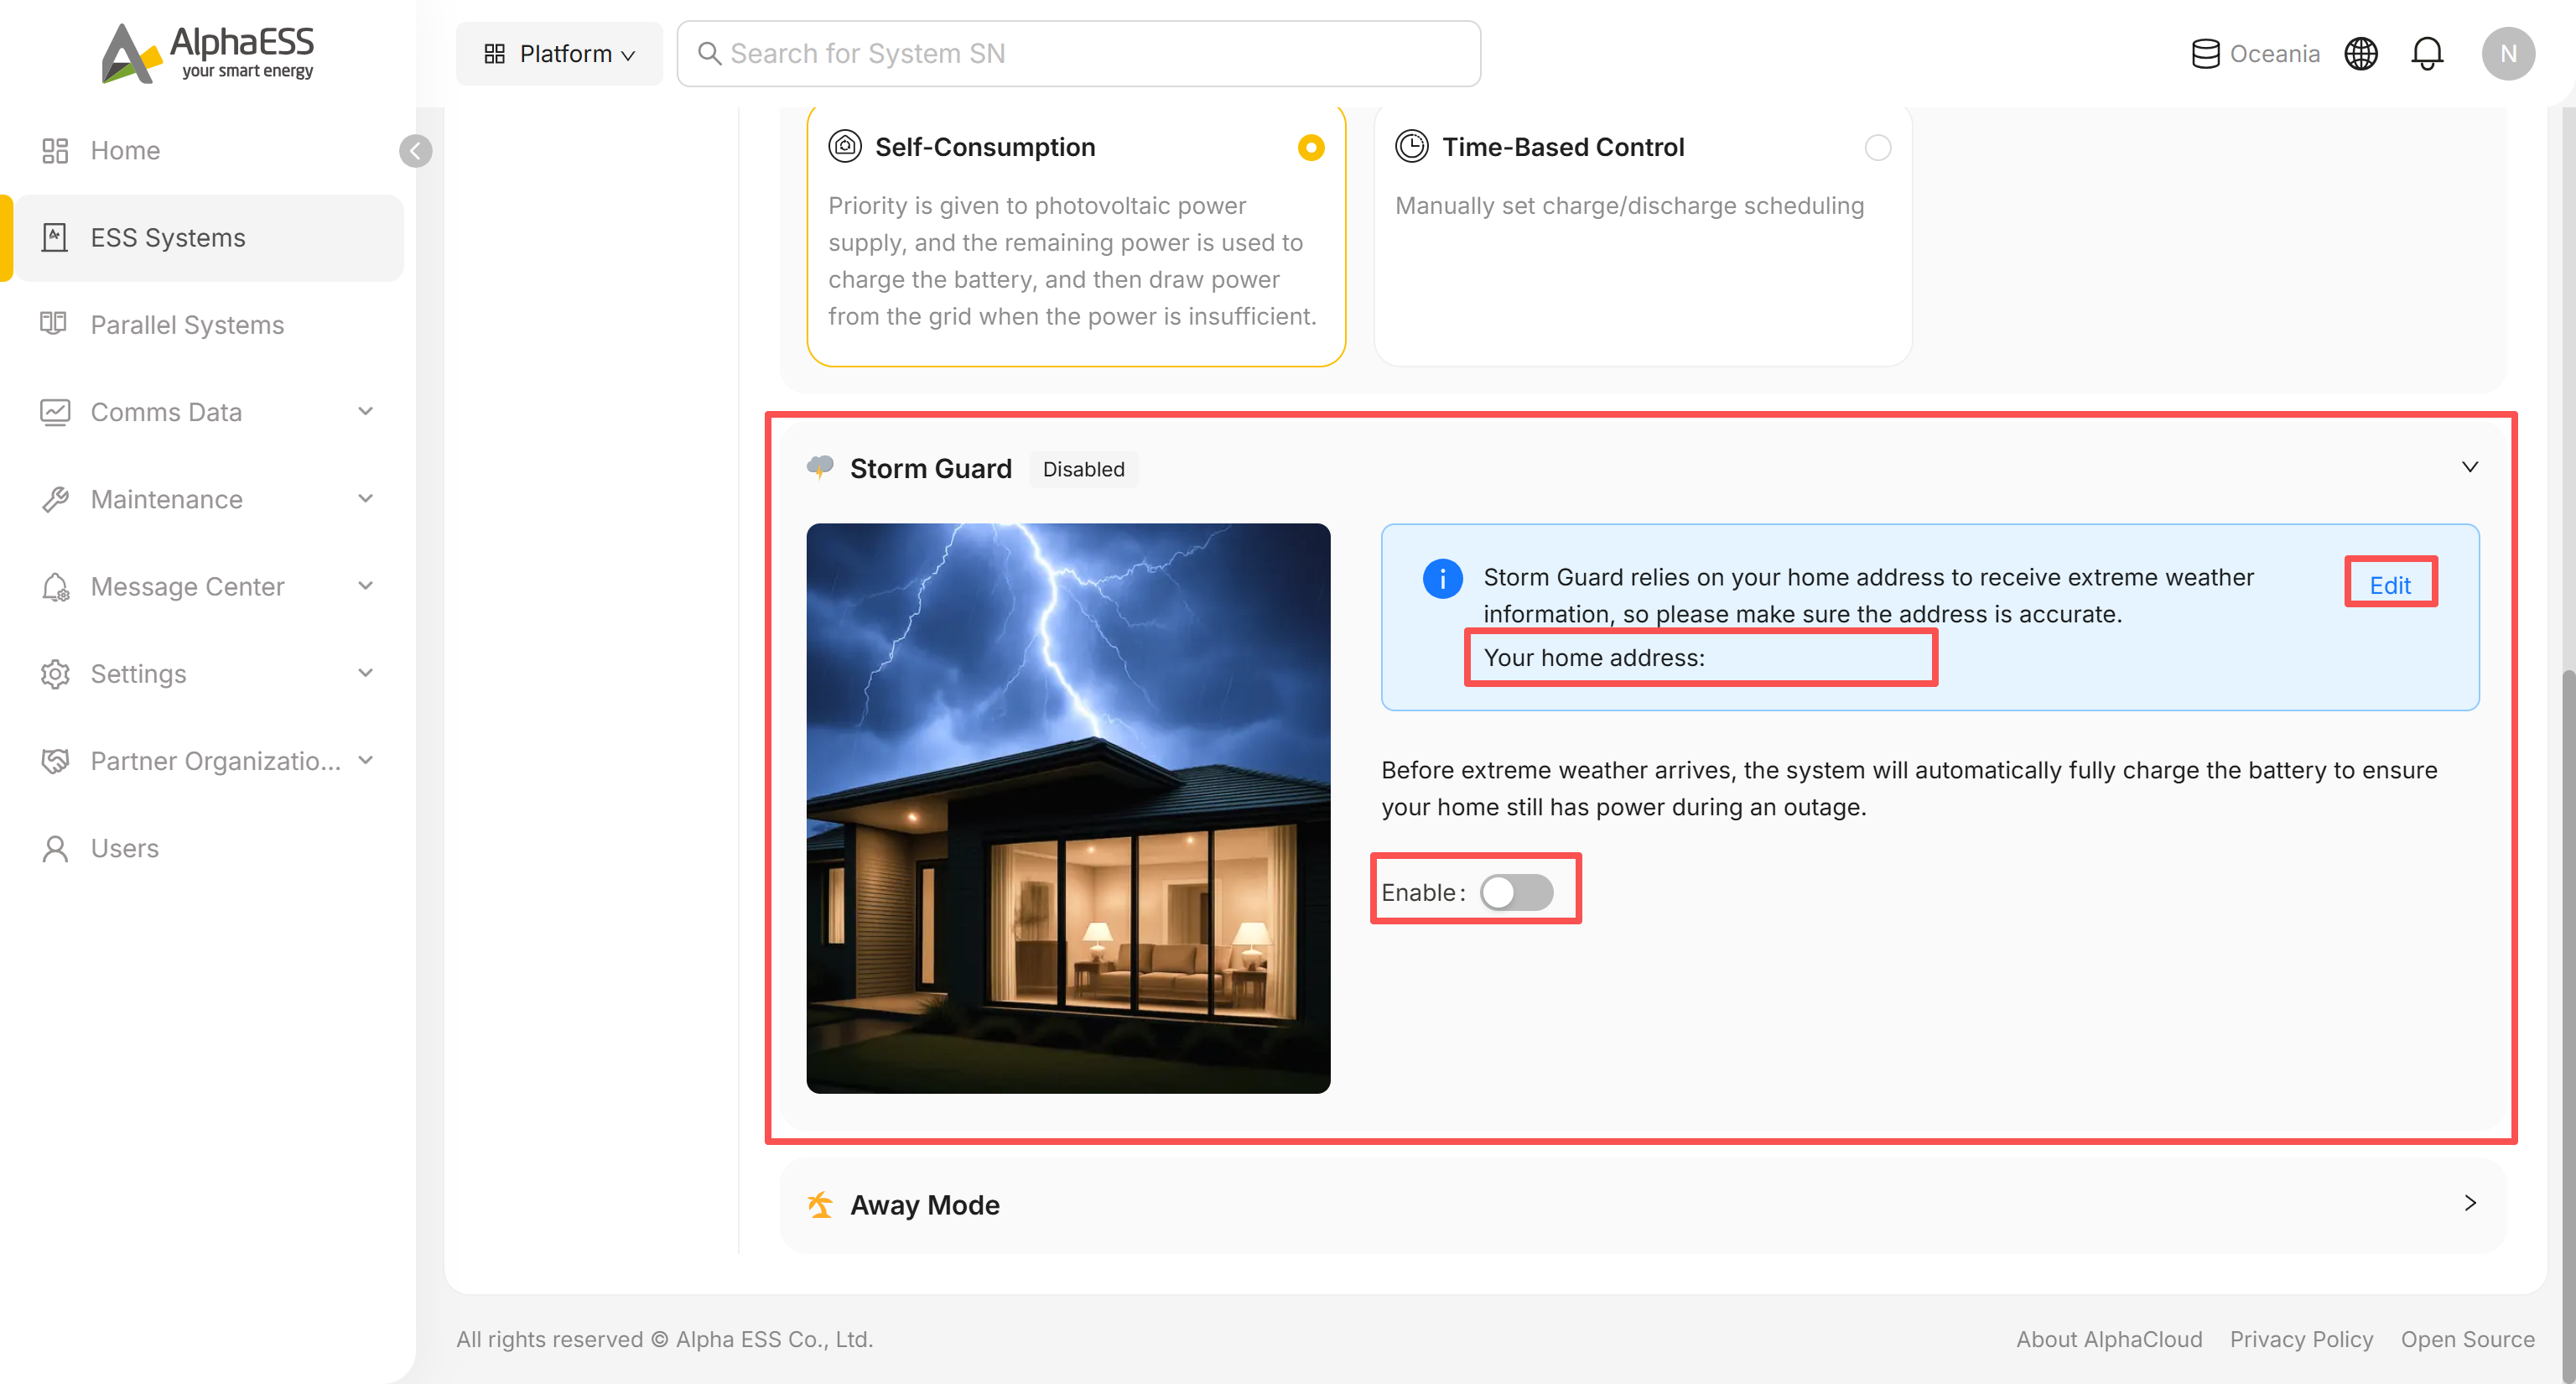
- Storm Guard relies on the site's registered address to receive extreme-weather alerts — check the address shown next to Your home address, and click Edit if it's wrong.
- Turn on Enable. Once active, the system automatically charges the battery to full ahead of severe weather so the owner still has backup power through an outage.
Away Mode
Only shown on some models/topologies. Click Away Mode to expand it.
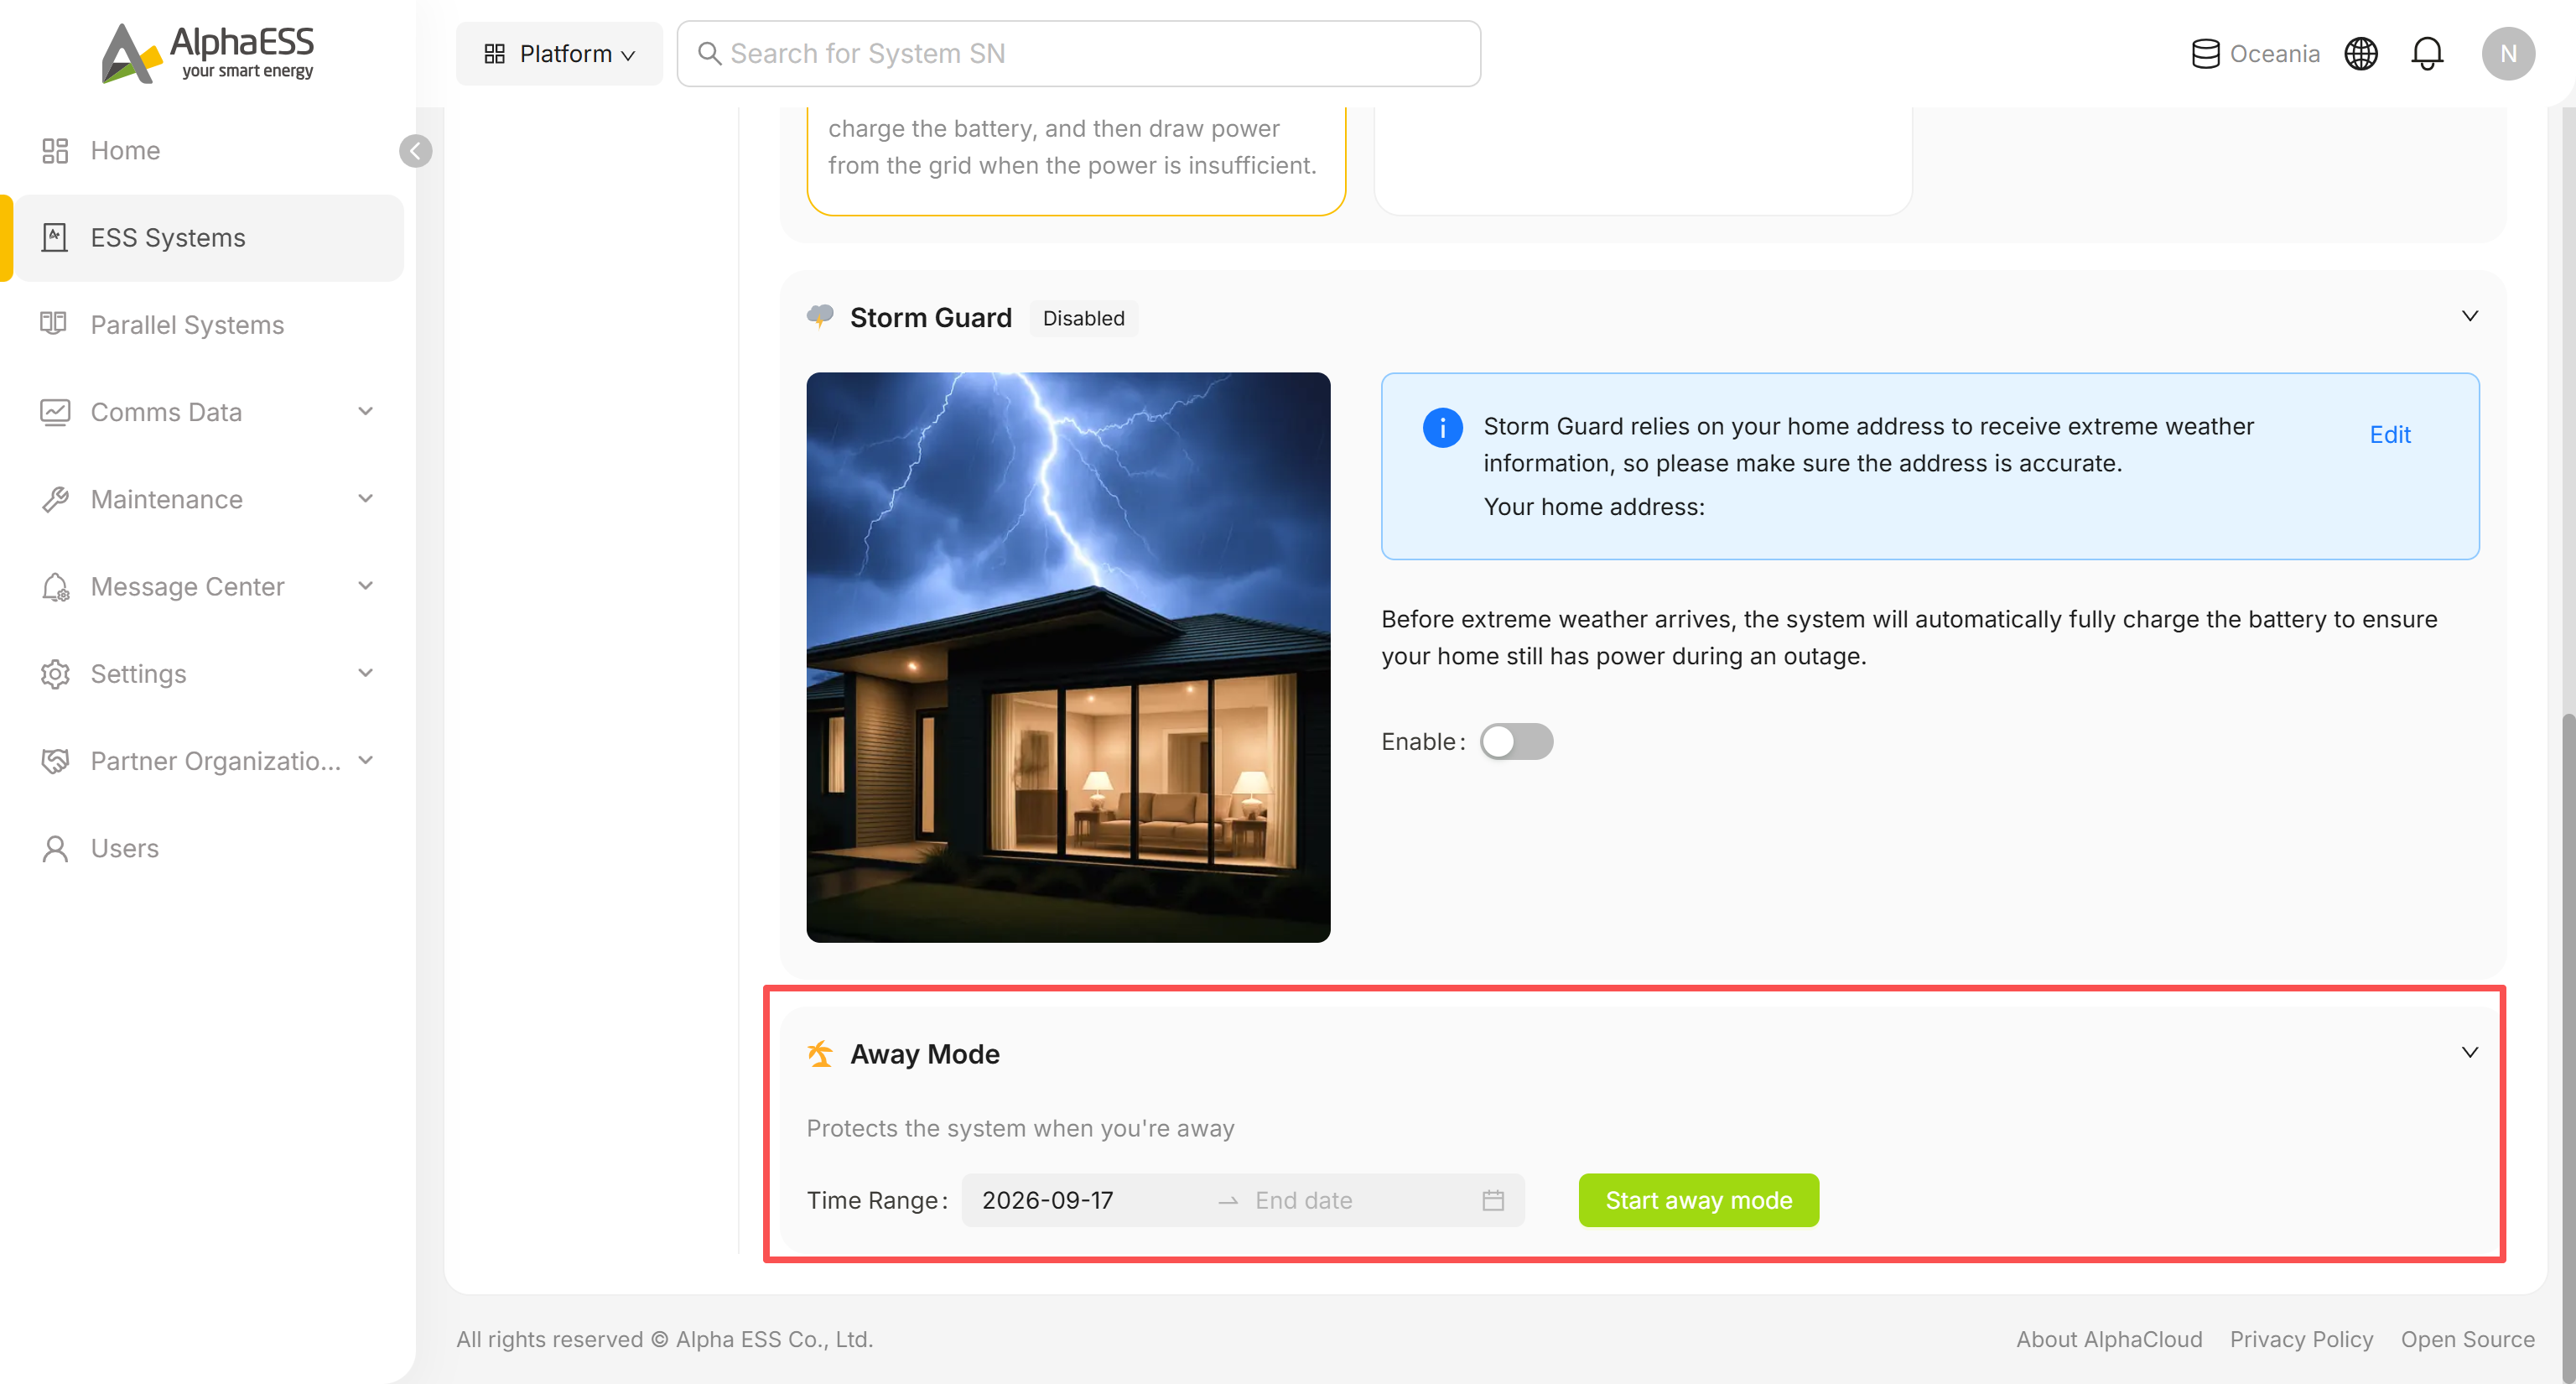
- Set the Time Range (start and end date) covering the period the owner will be away.
- Click Start away mode. The system switches into a protective away-mode configuration for that date range.
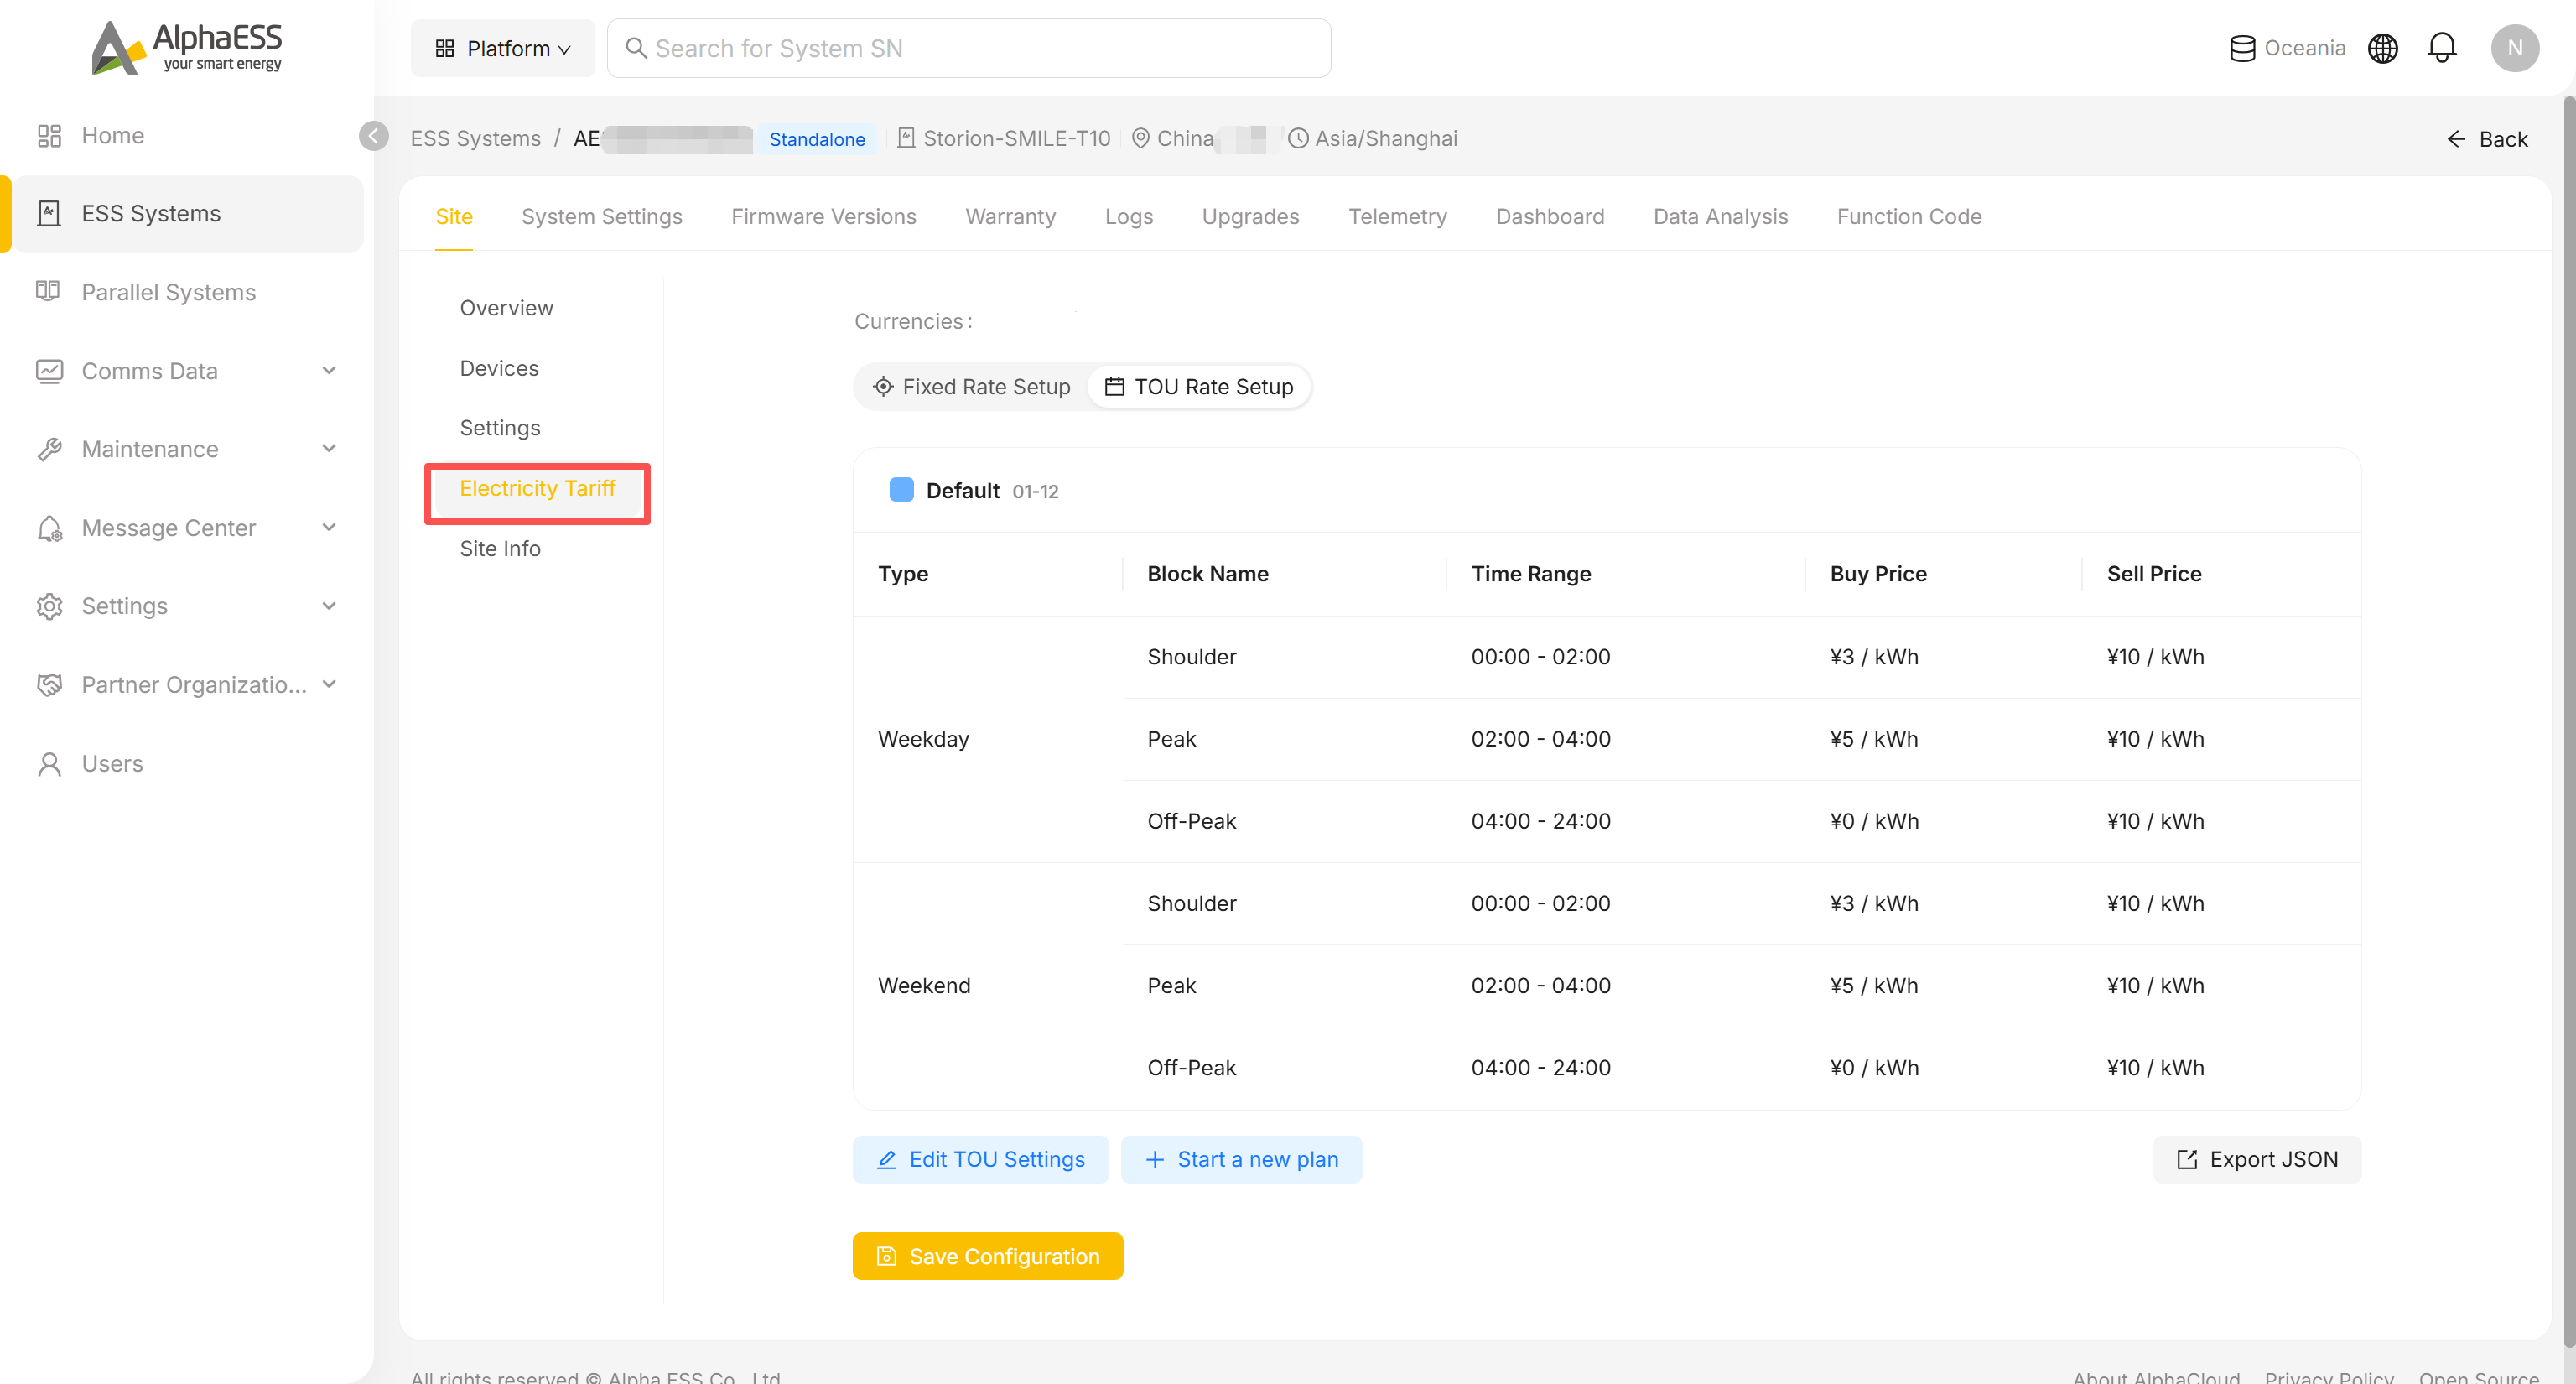
Site → Electricity Tariff
Configure the site's electricity tariff scheme, used for Profit statistics and tariff-based scheduling. Switch between Fixed Rate Setup (a single Buy/Sell price) and TOU Rate Setup (time-of-use blocks by weekday/weekend, each with its own Buy/Sell price). The exact fields vary by country/tariff type, so it isn't covered field-by-field here.
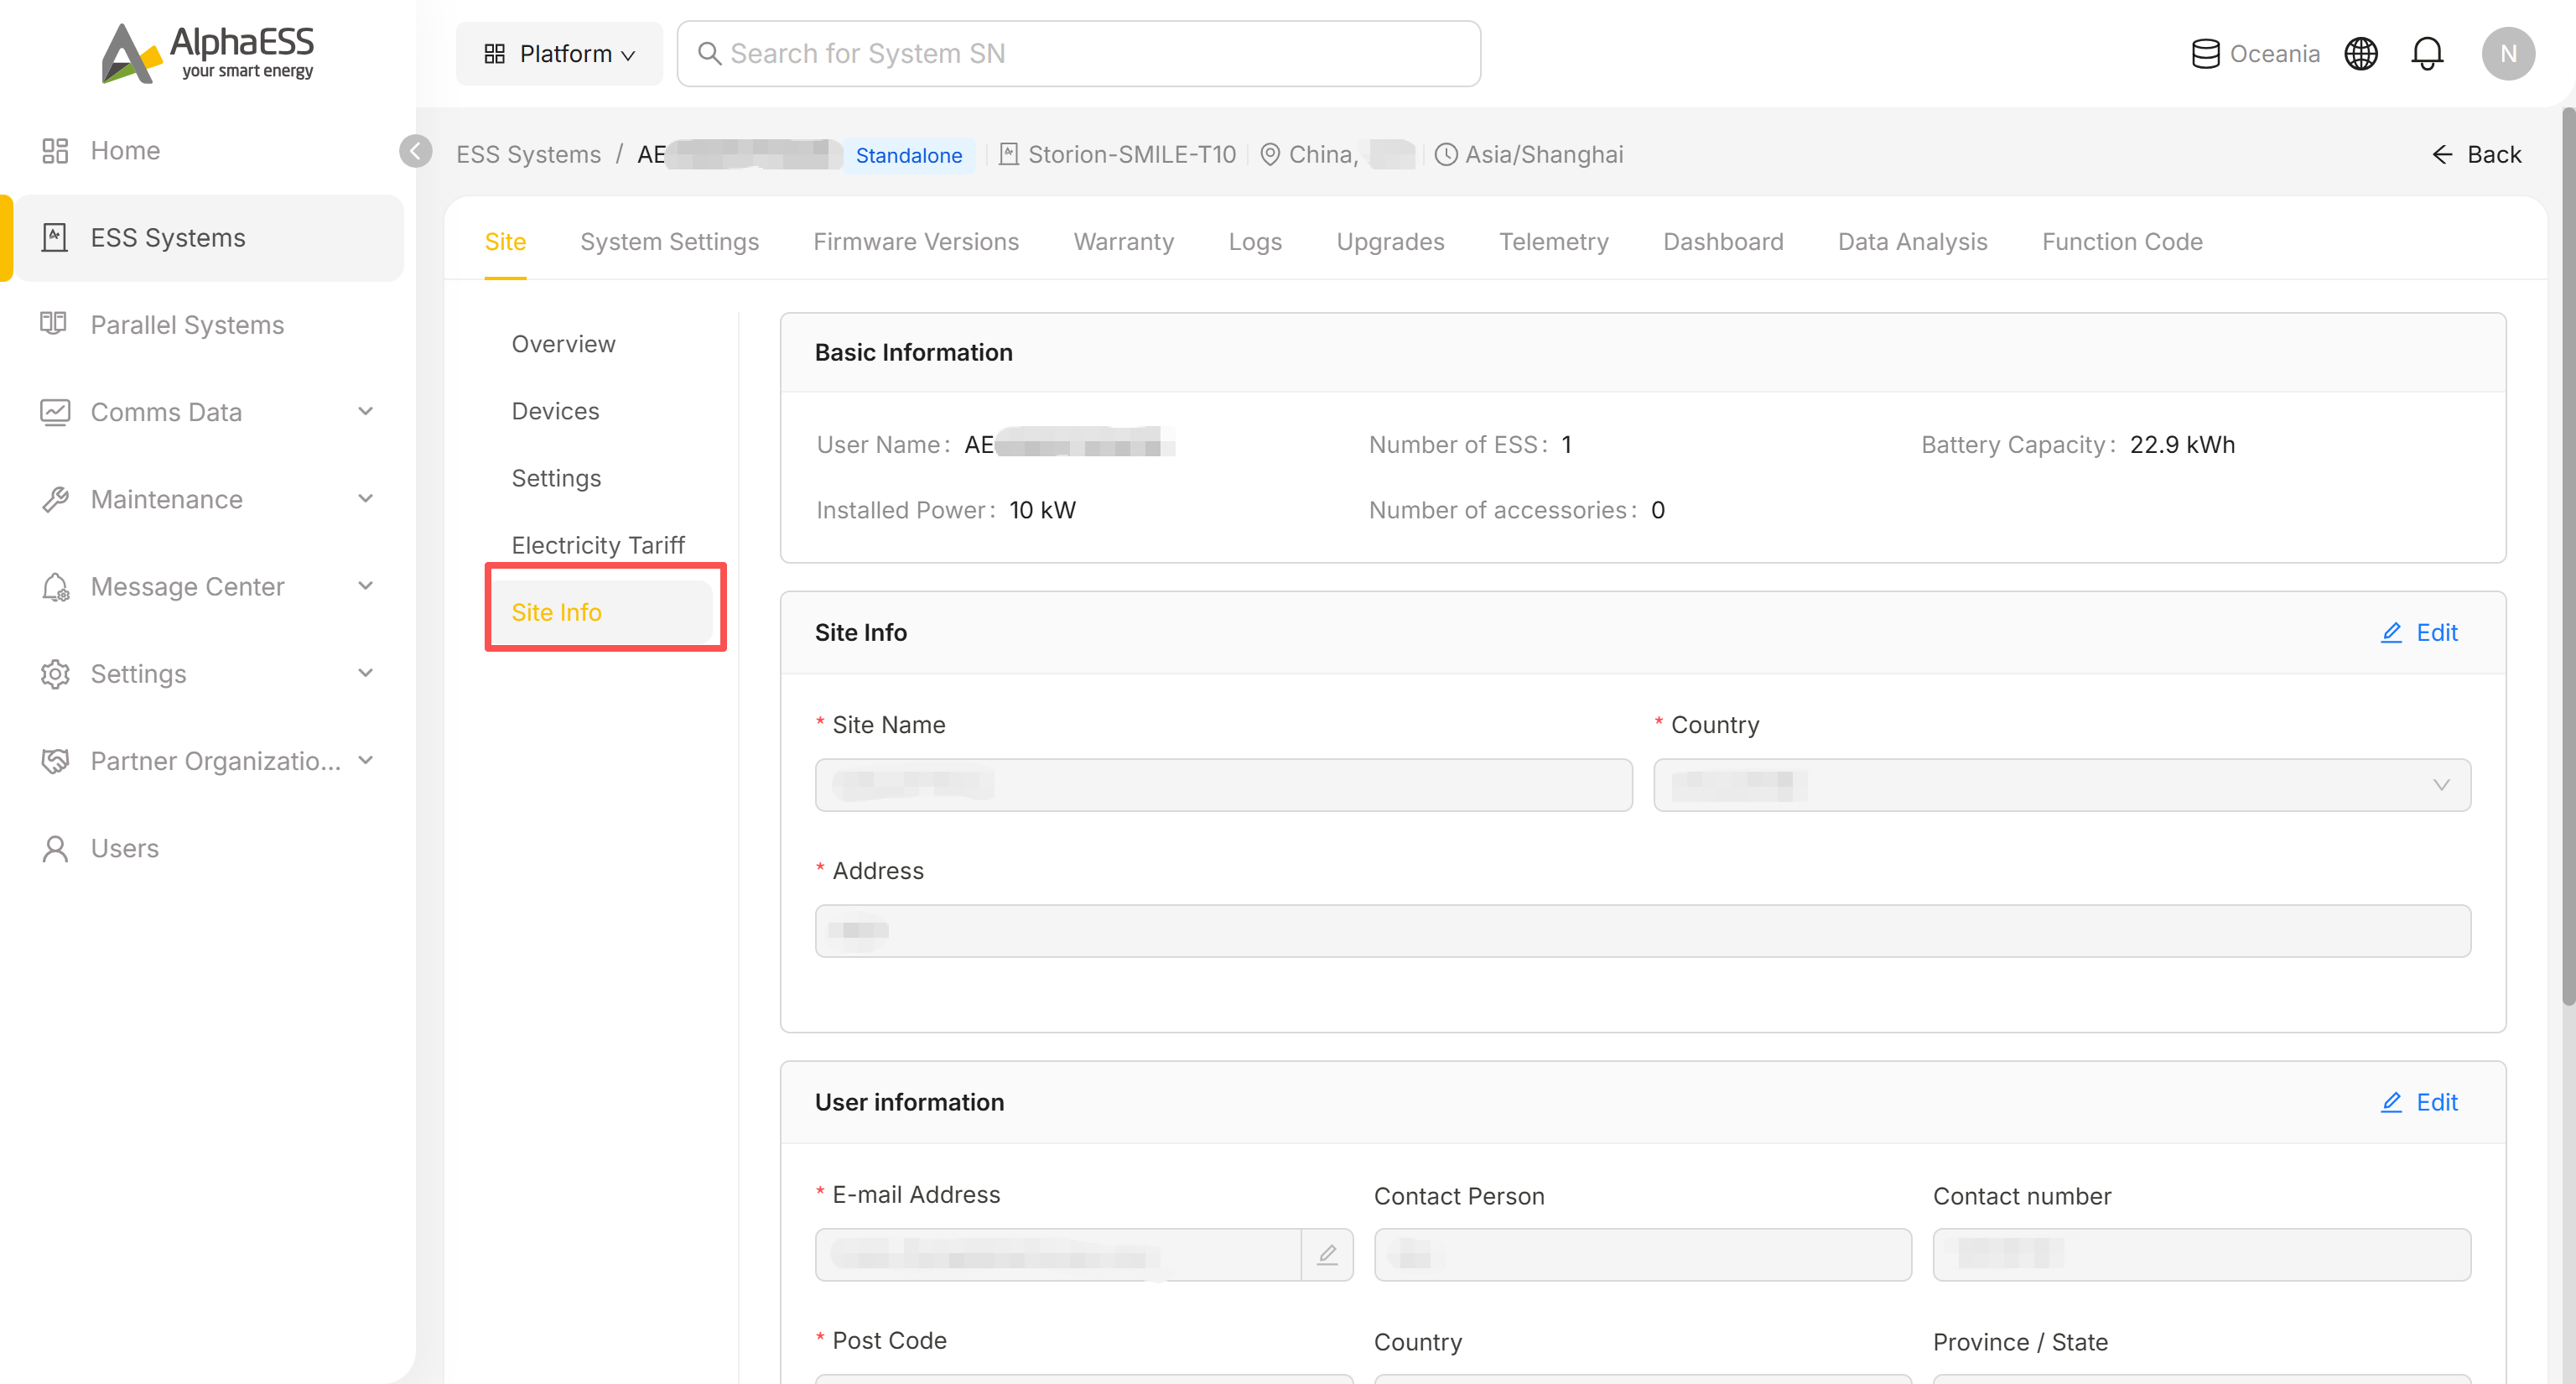
Site → Site Info (site and owner information)
Maintain the site record and the owner's contact details:
- Basic Information: user name, number of ESS, installed power, battery capacity, number of accessories
- Site Info: Site Name, Country, Address (click Edit to change)
- User information: owner's E-mail, Contact Person, Contact number
System Settings (device-level parameters)
Go to the System Settings tab. The left-hand groups and the items inside CONTROL/DIAGNOSTICS vary by device model — the list below is what you may see, not a fixed set.
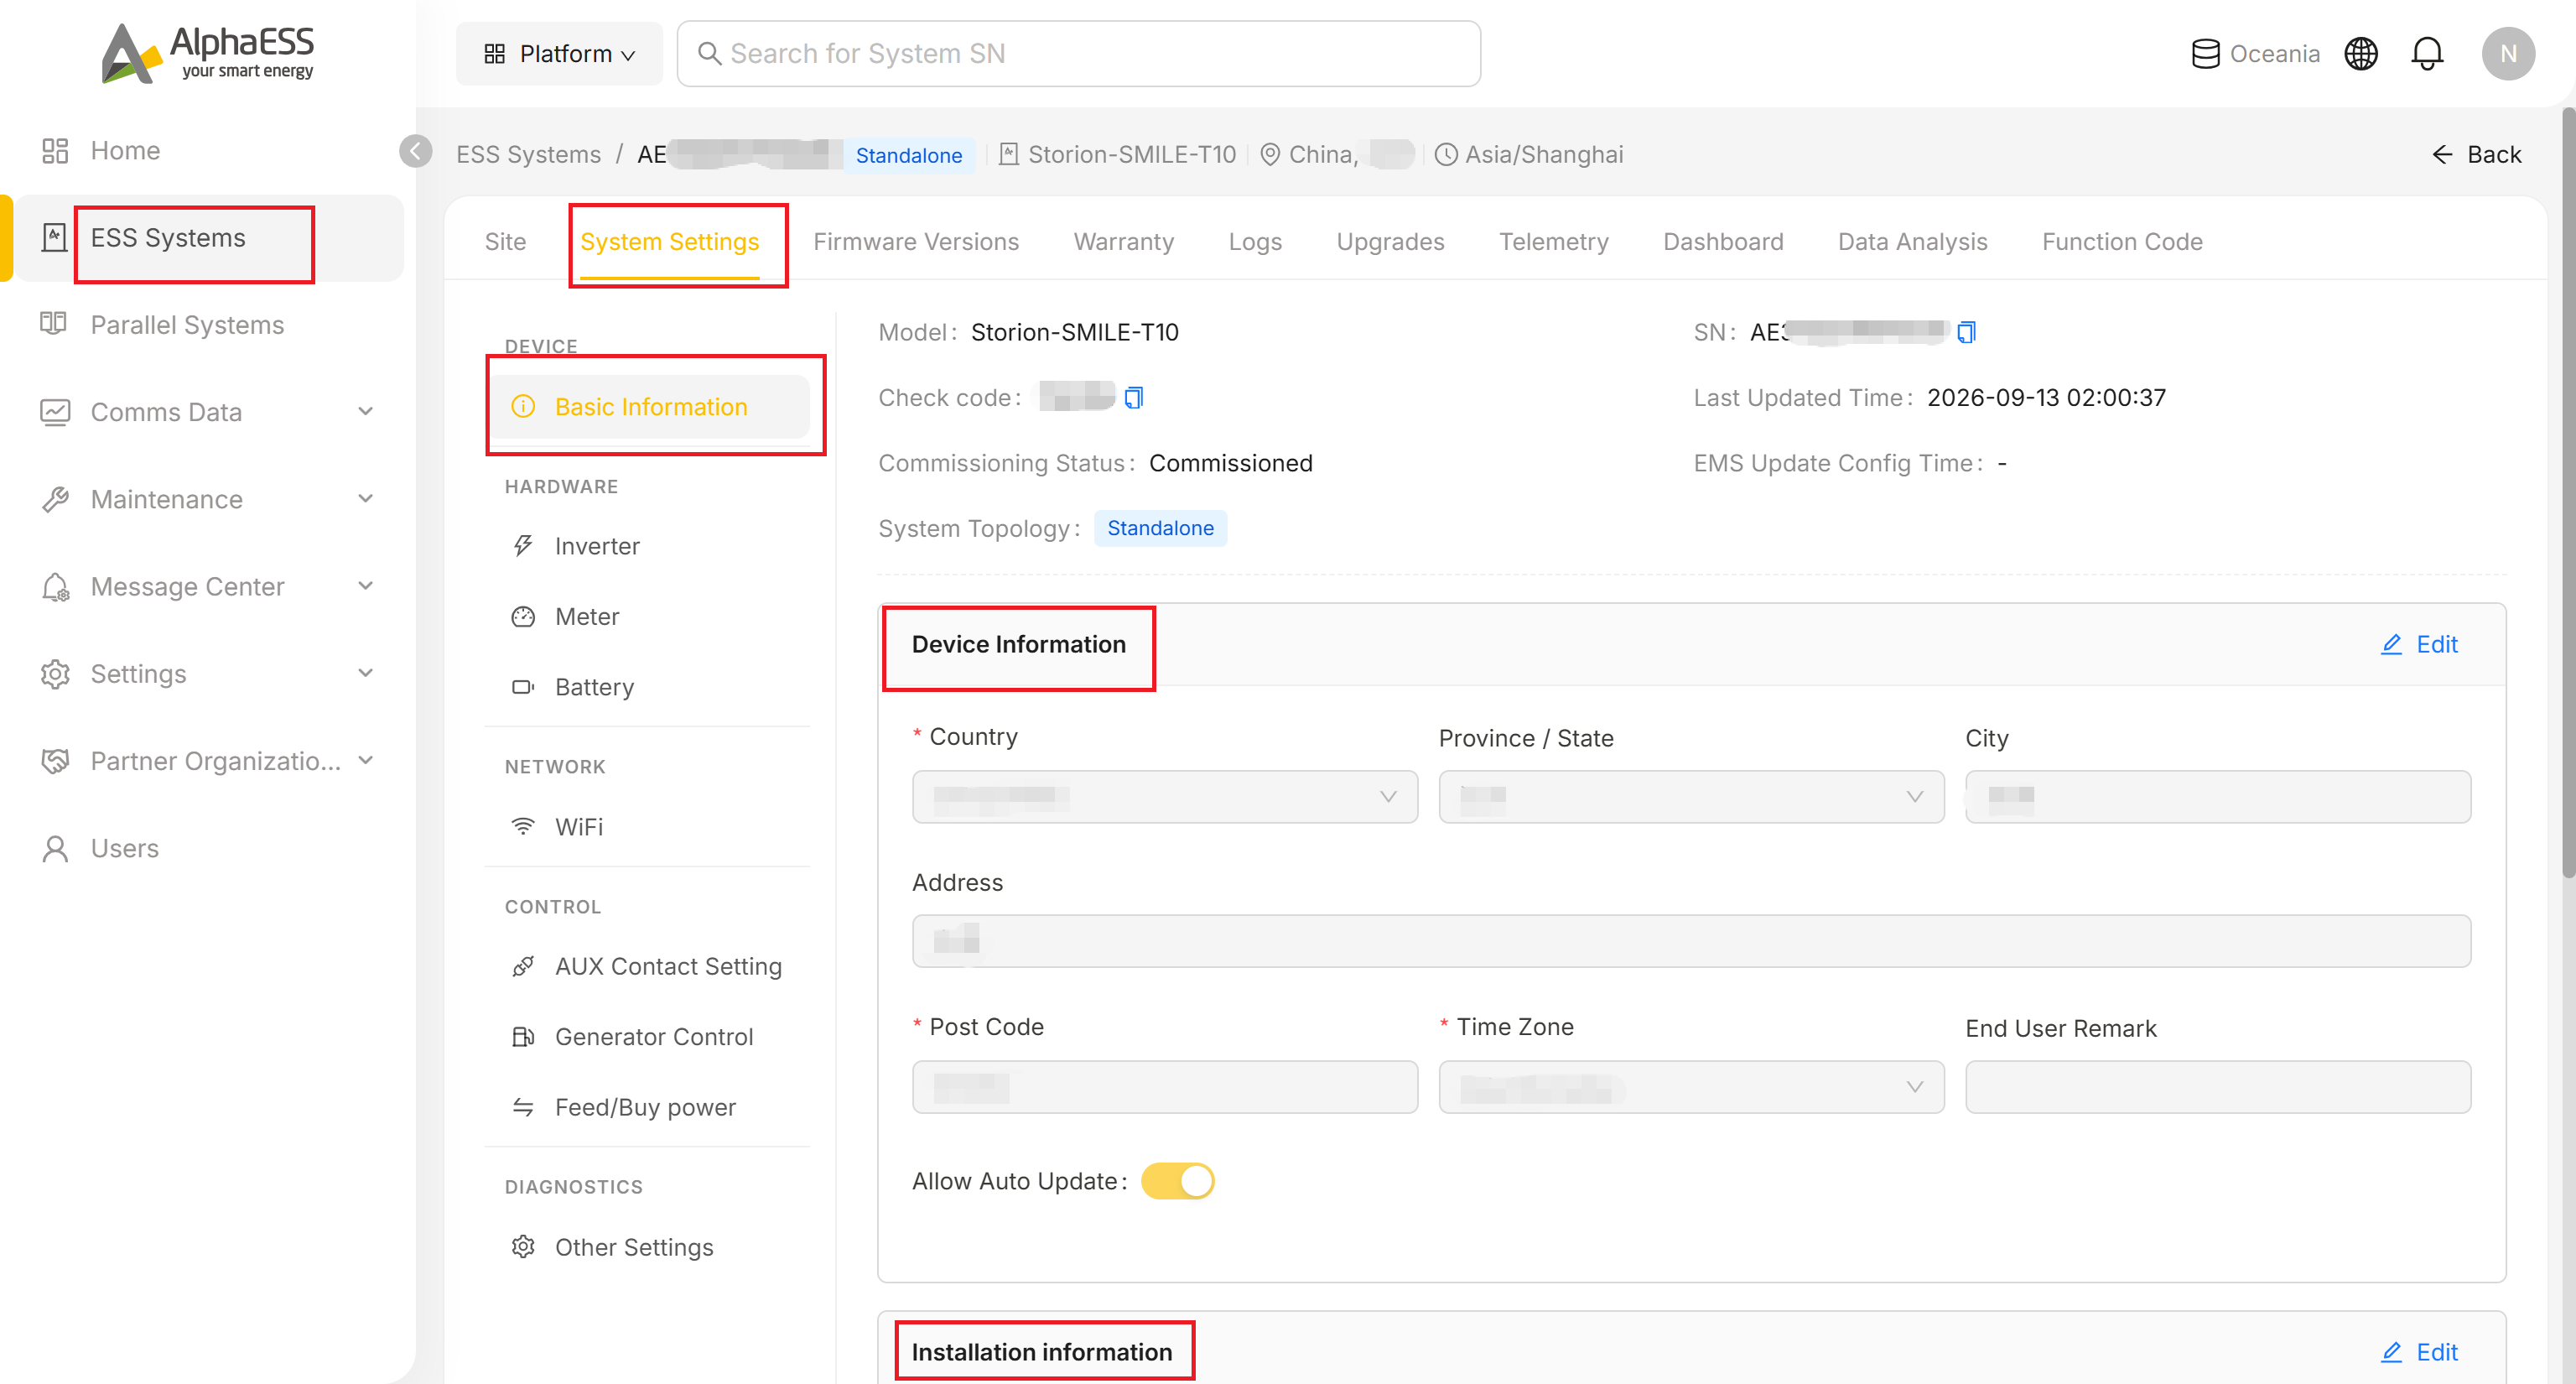
| Group | Typical contents |
|---|---|
| DEVICE → Basic Information | Model, SN, Check code, Commissioning Status, System Topology; editable Device Information (Country, Province/State, City, Address, Post Code, Time Zone, End User Remark, Allow Auto Update); read-only Installation information (Installation Organization, Installer Account, Installation Date, License, Installer/Reseller Remark) |
| HARDWARE | Inverter / Meter / Battery — mostly installation-time parameters (safety standard, installation mode, rated power, etc.); edit only if you understand the electrical implications |
| NETWORK → WiFi | Read-only Wi-Fi module info (SN, versions, LAN IP) |
| CONTROL | Depending on the model: AUX Contact Setting (up to two dry-contact outputs), Generator Control (enable/disable diesel generator integration), Feed/Buy power (maximum feed-in power, as an absolute value or a percentage factor) |
| DIAGNOSTICS → Other Settings | Not present on every model. When shown: EMS display language and Enable Vpp Scheduling |
💡 Tip: Check code can be copied and shared with owners/colleagues for binding purposes. Allow Auto Update controls whether the device upgrades automatically on new firmware releases.
AUX Contact Setting
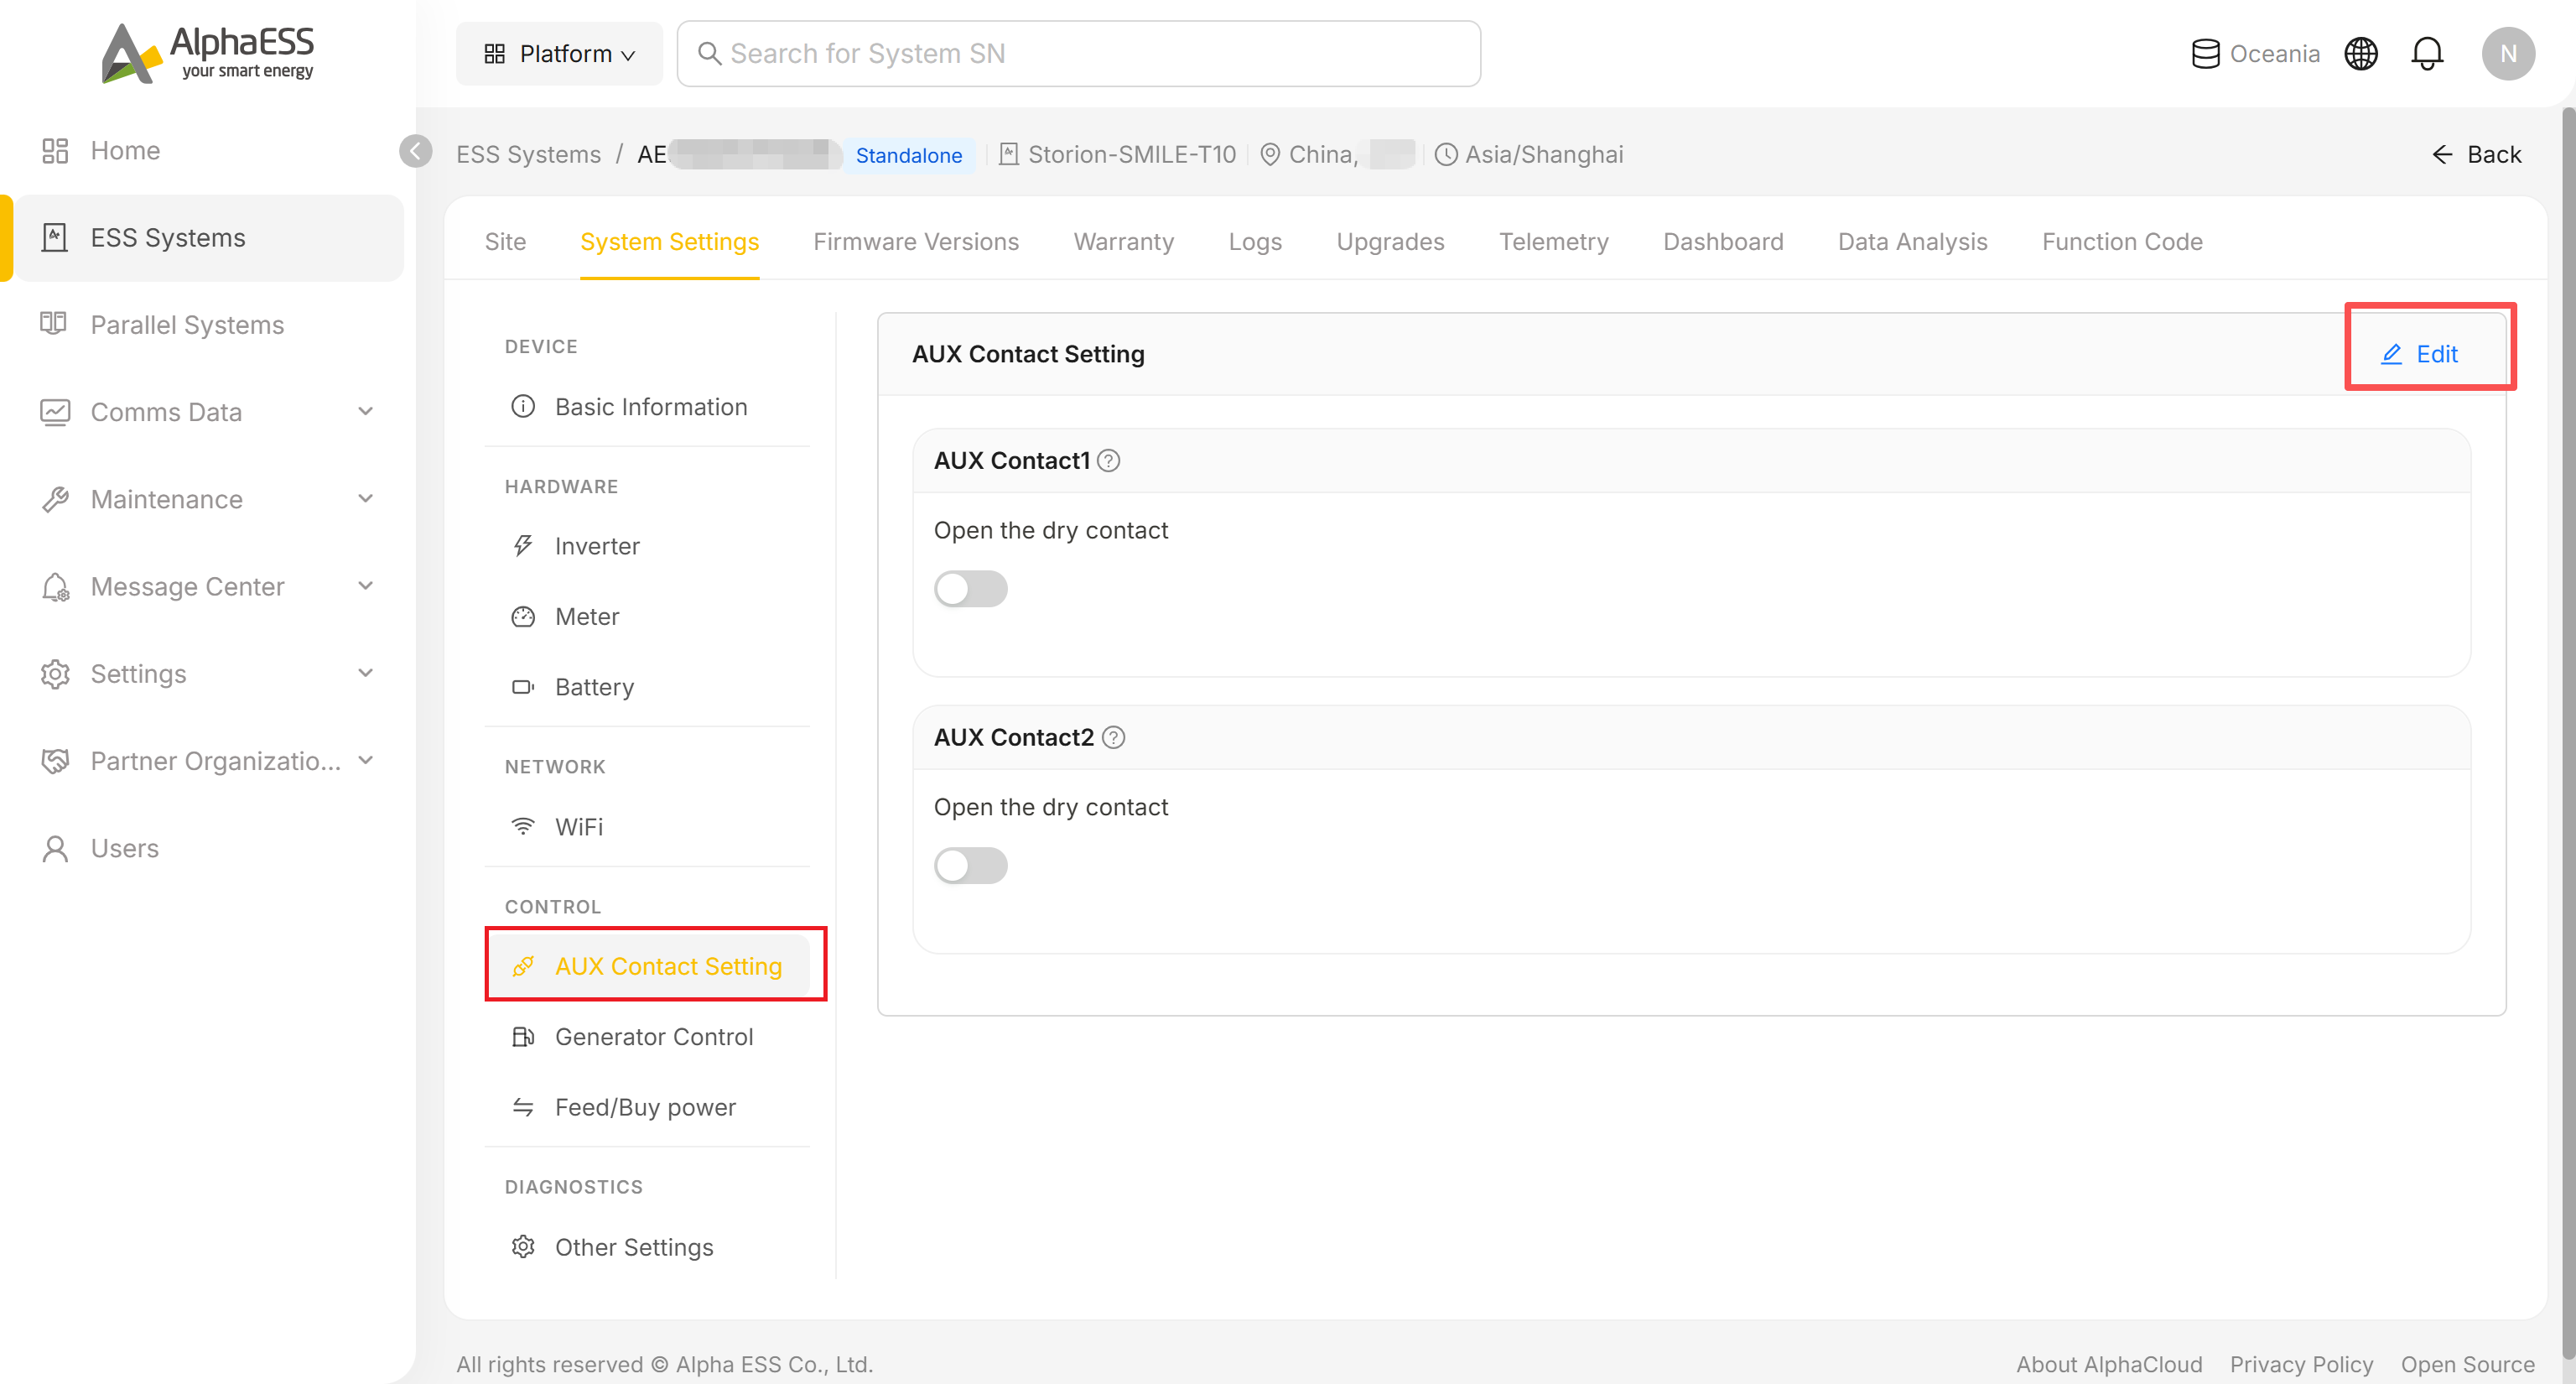
Click Edit, then toggle AUX Contact1 / AUX Contact2 to open the corresponding dry contact, and Save.
Generator Control
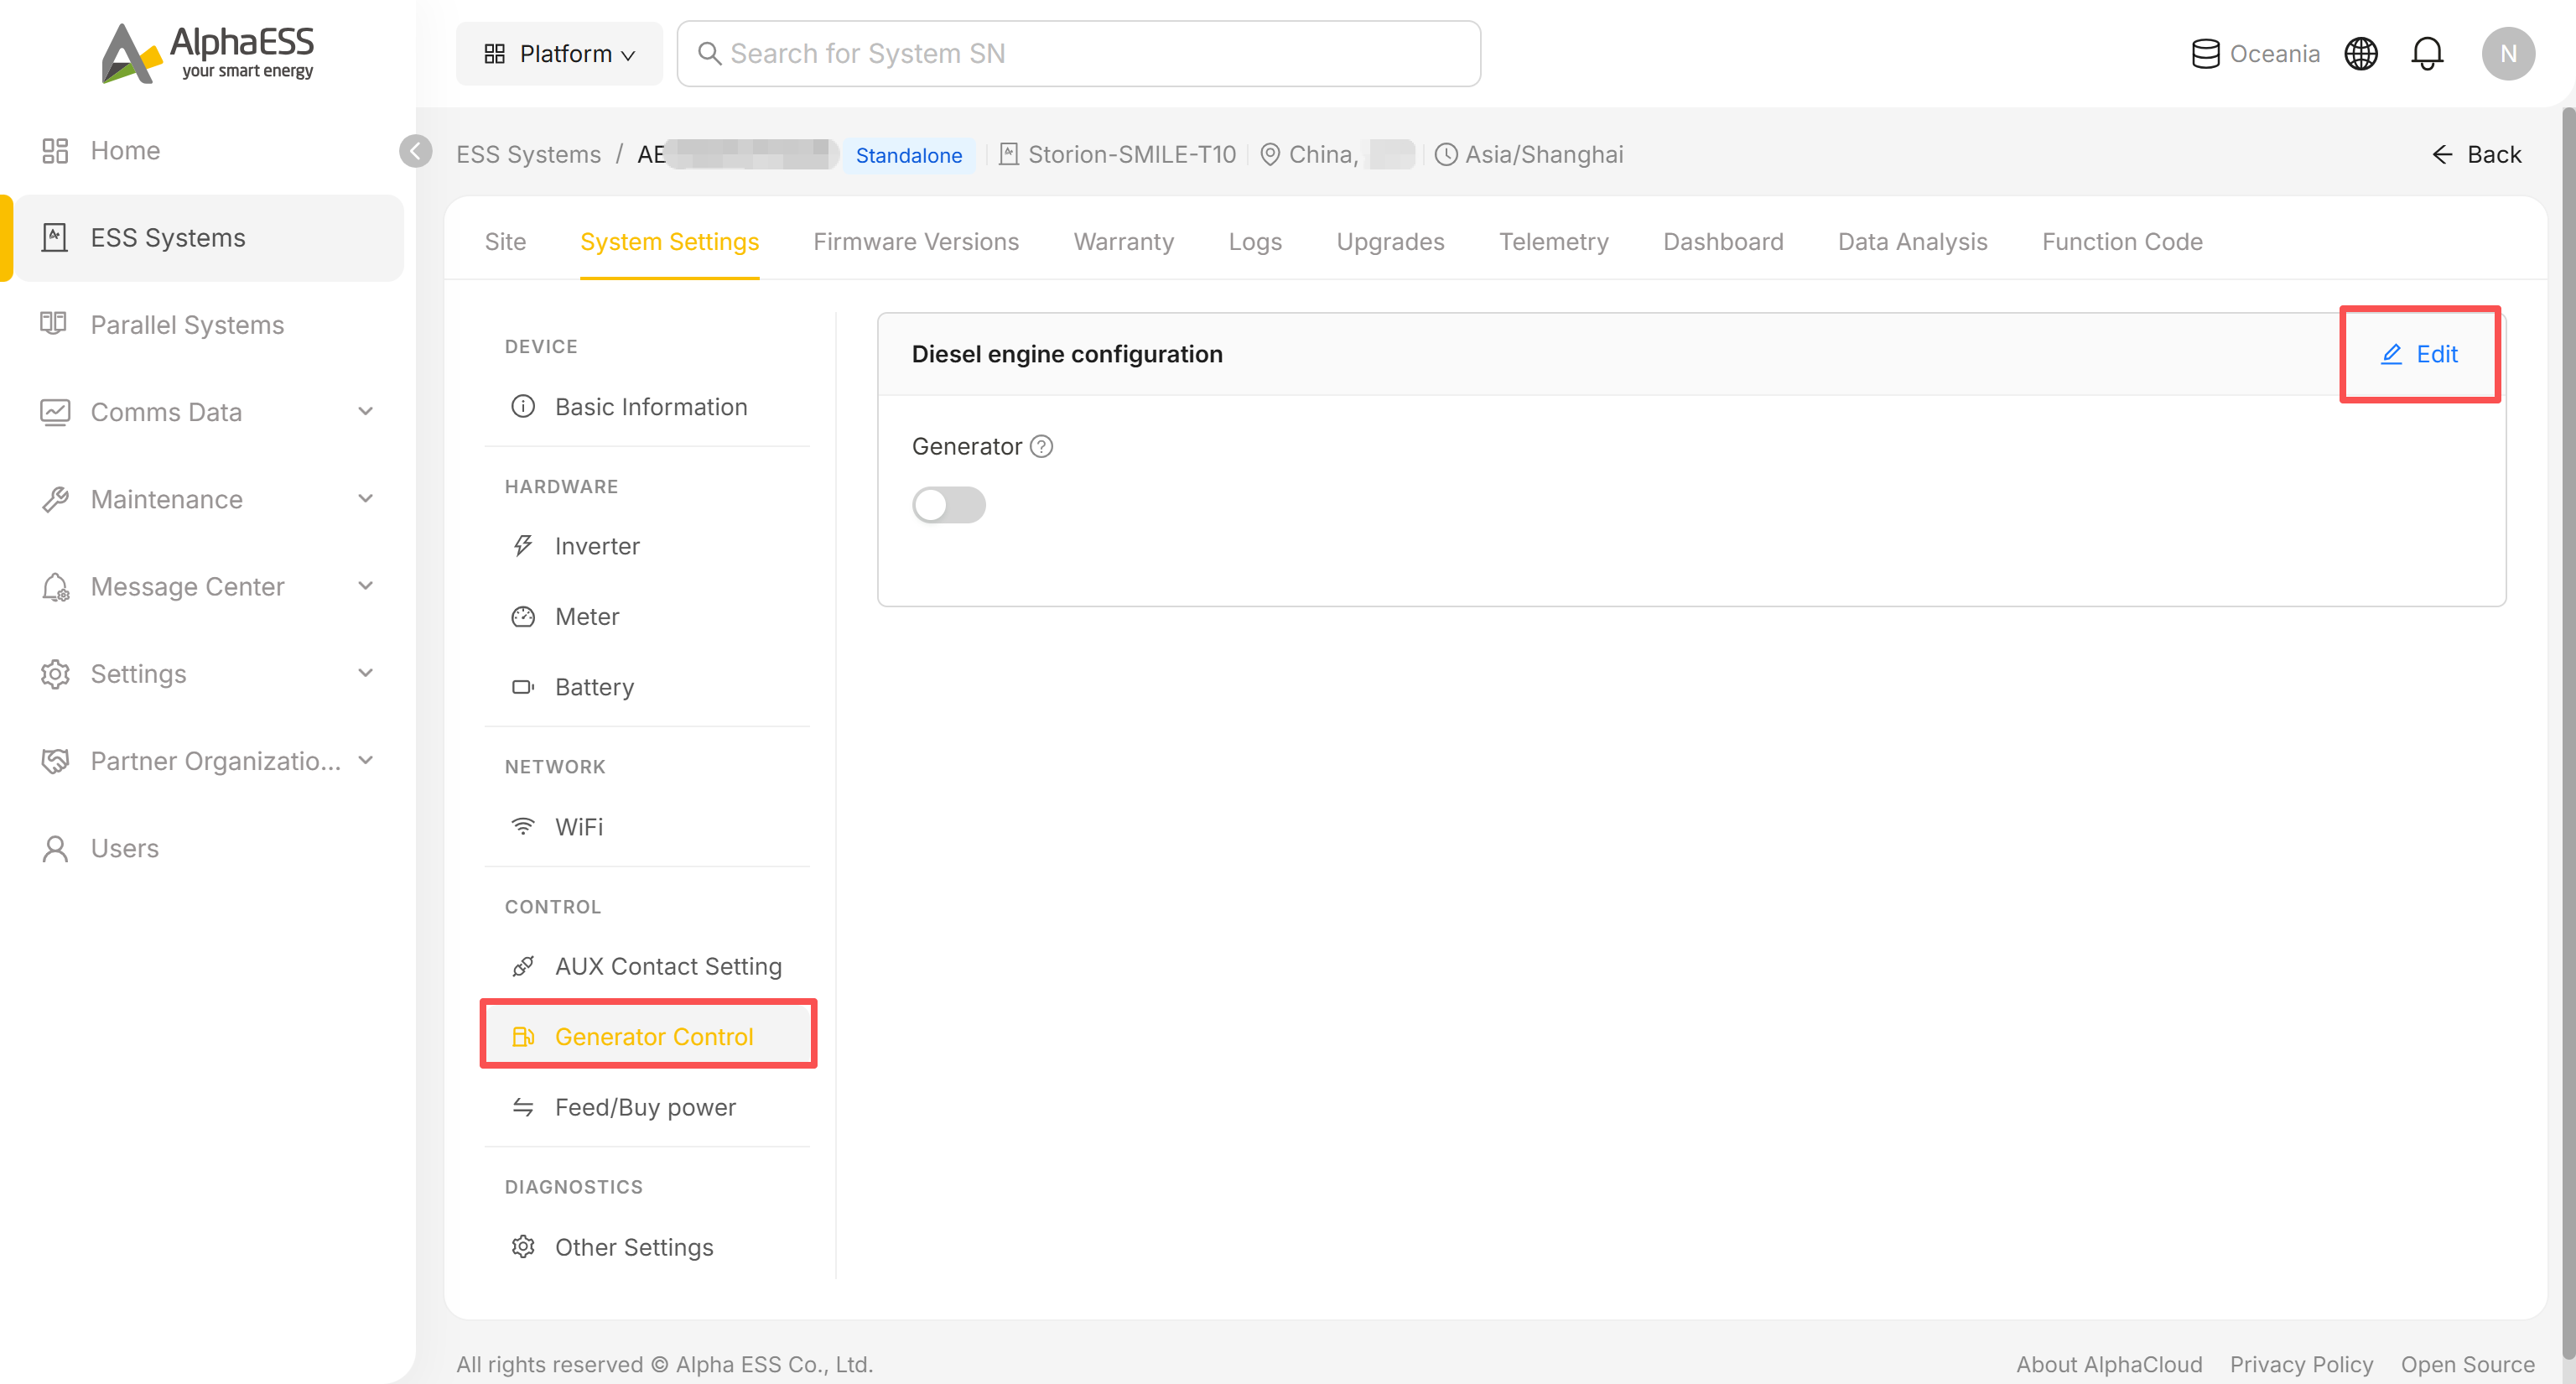
Click Edit, toggle Generator on to enable diesel-generator integration for the site, and Save.
Feed/Buy power
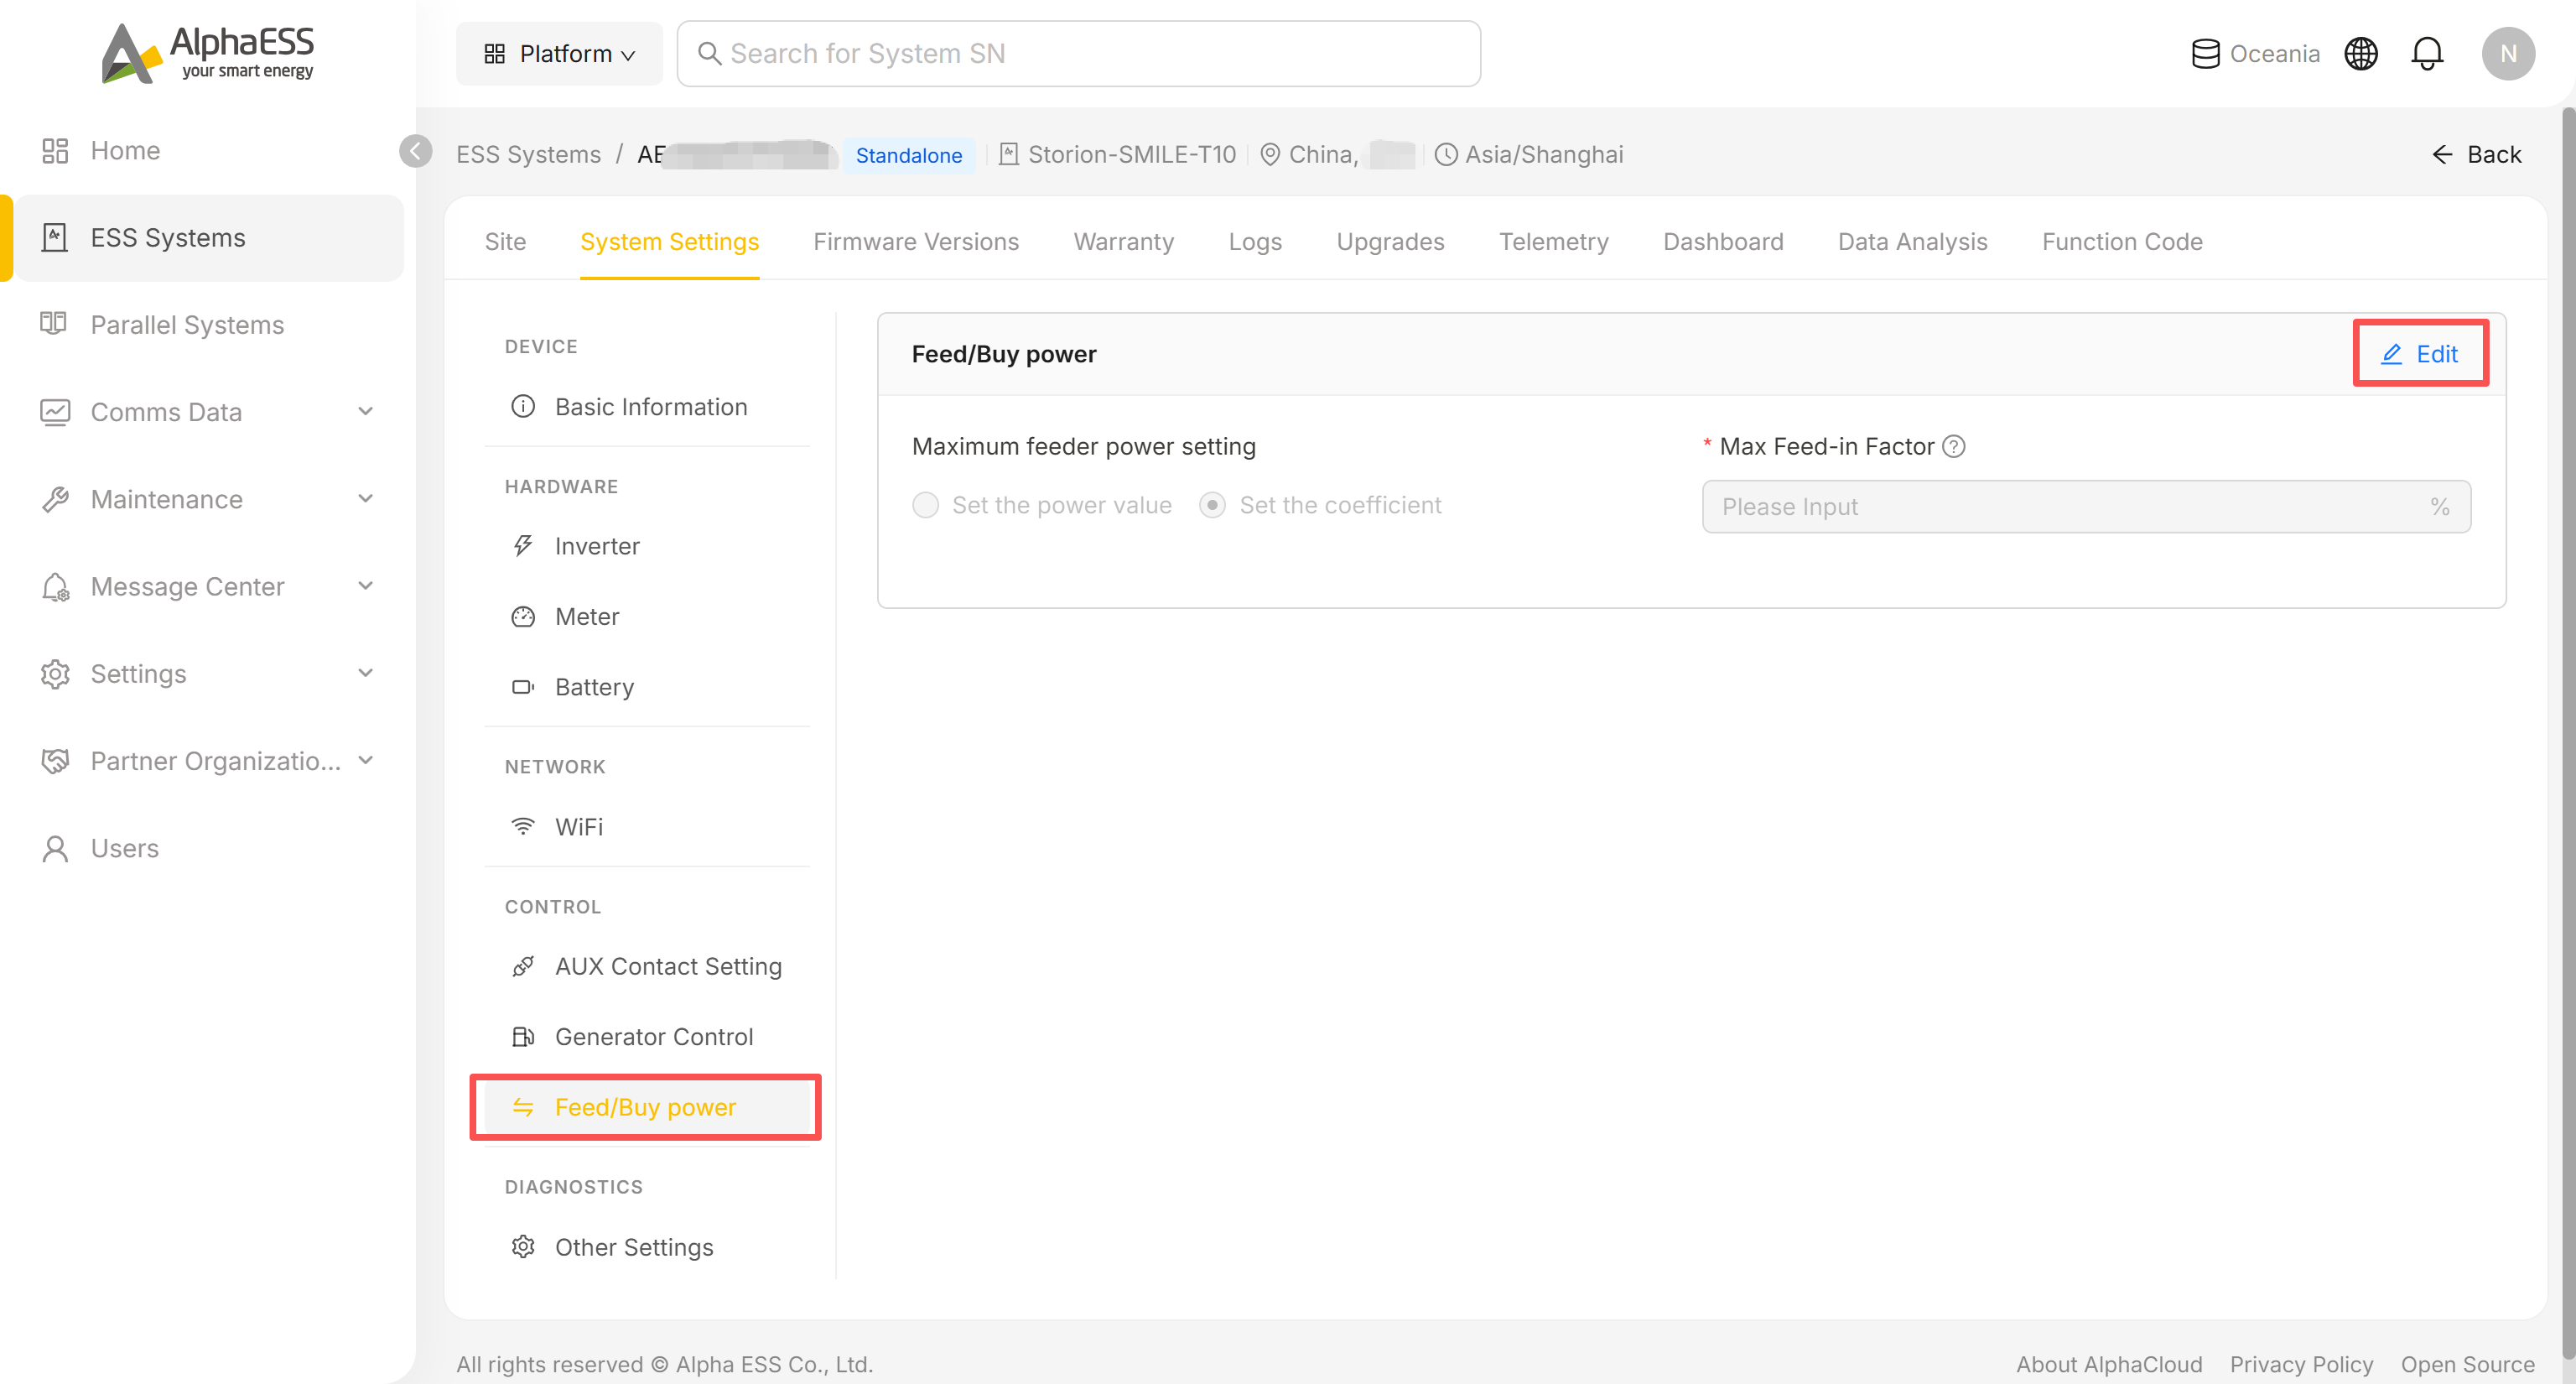
Click Edit, choose Set the power value or Set the coefficient, enter the Max Feed-in Factor (or power value), and Save. This limits how much power the site can export to the grid.
Other Settings
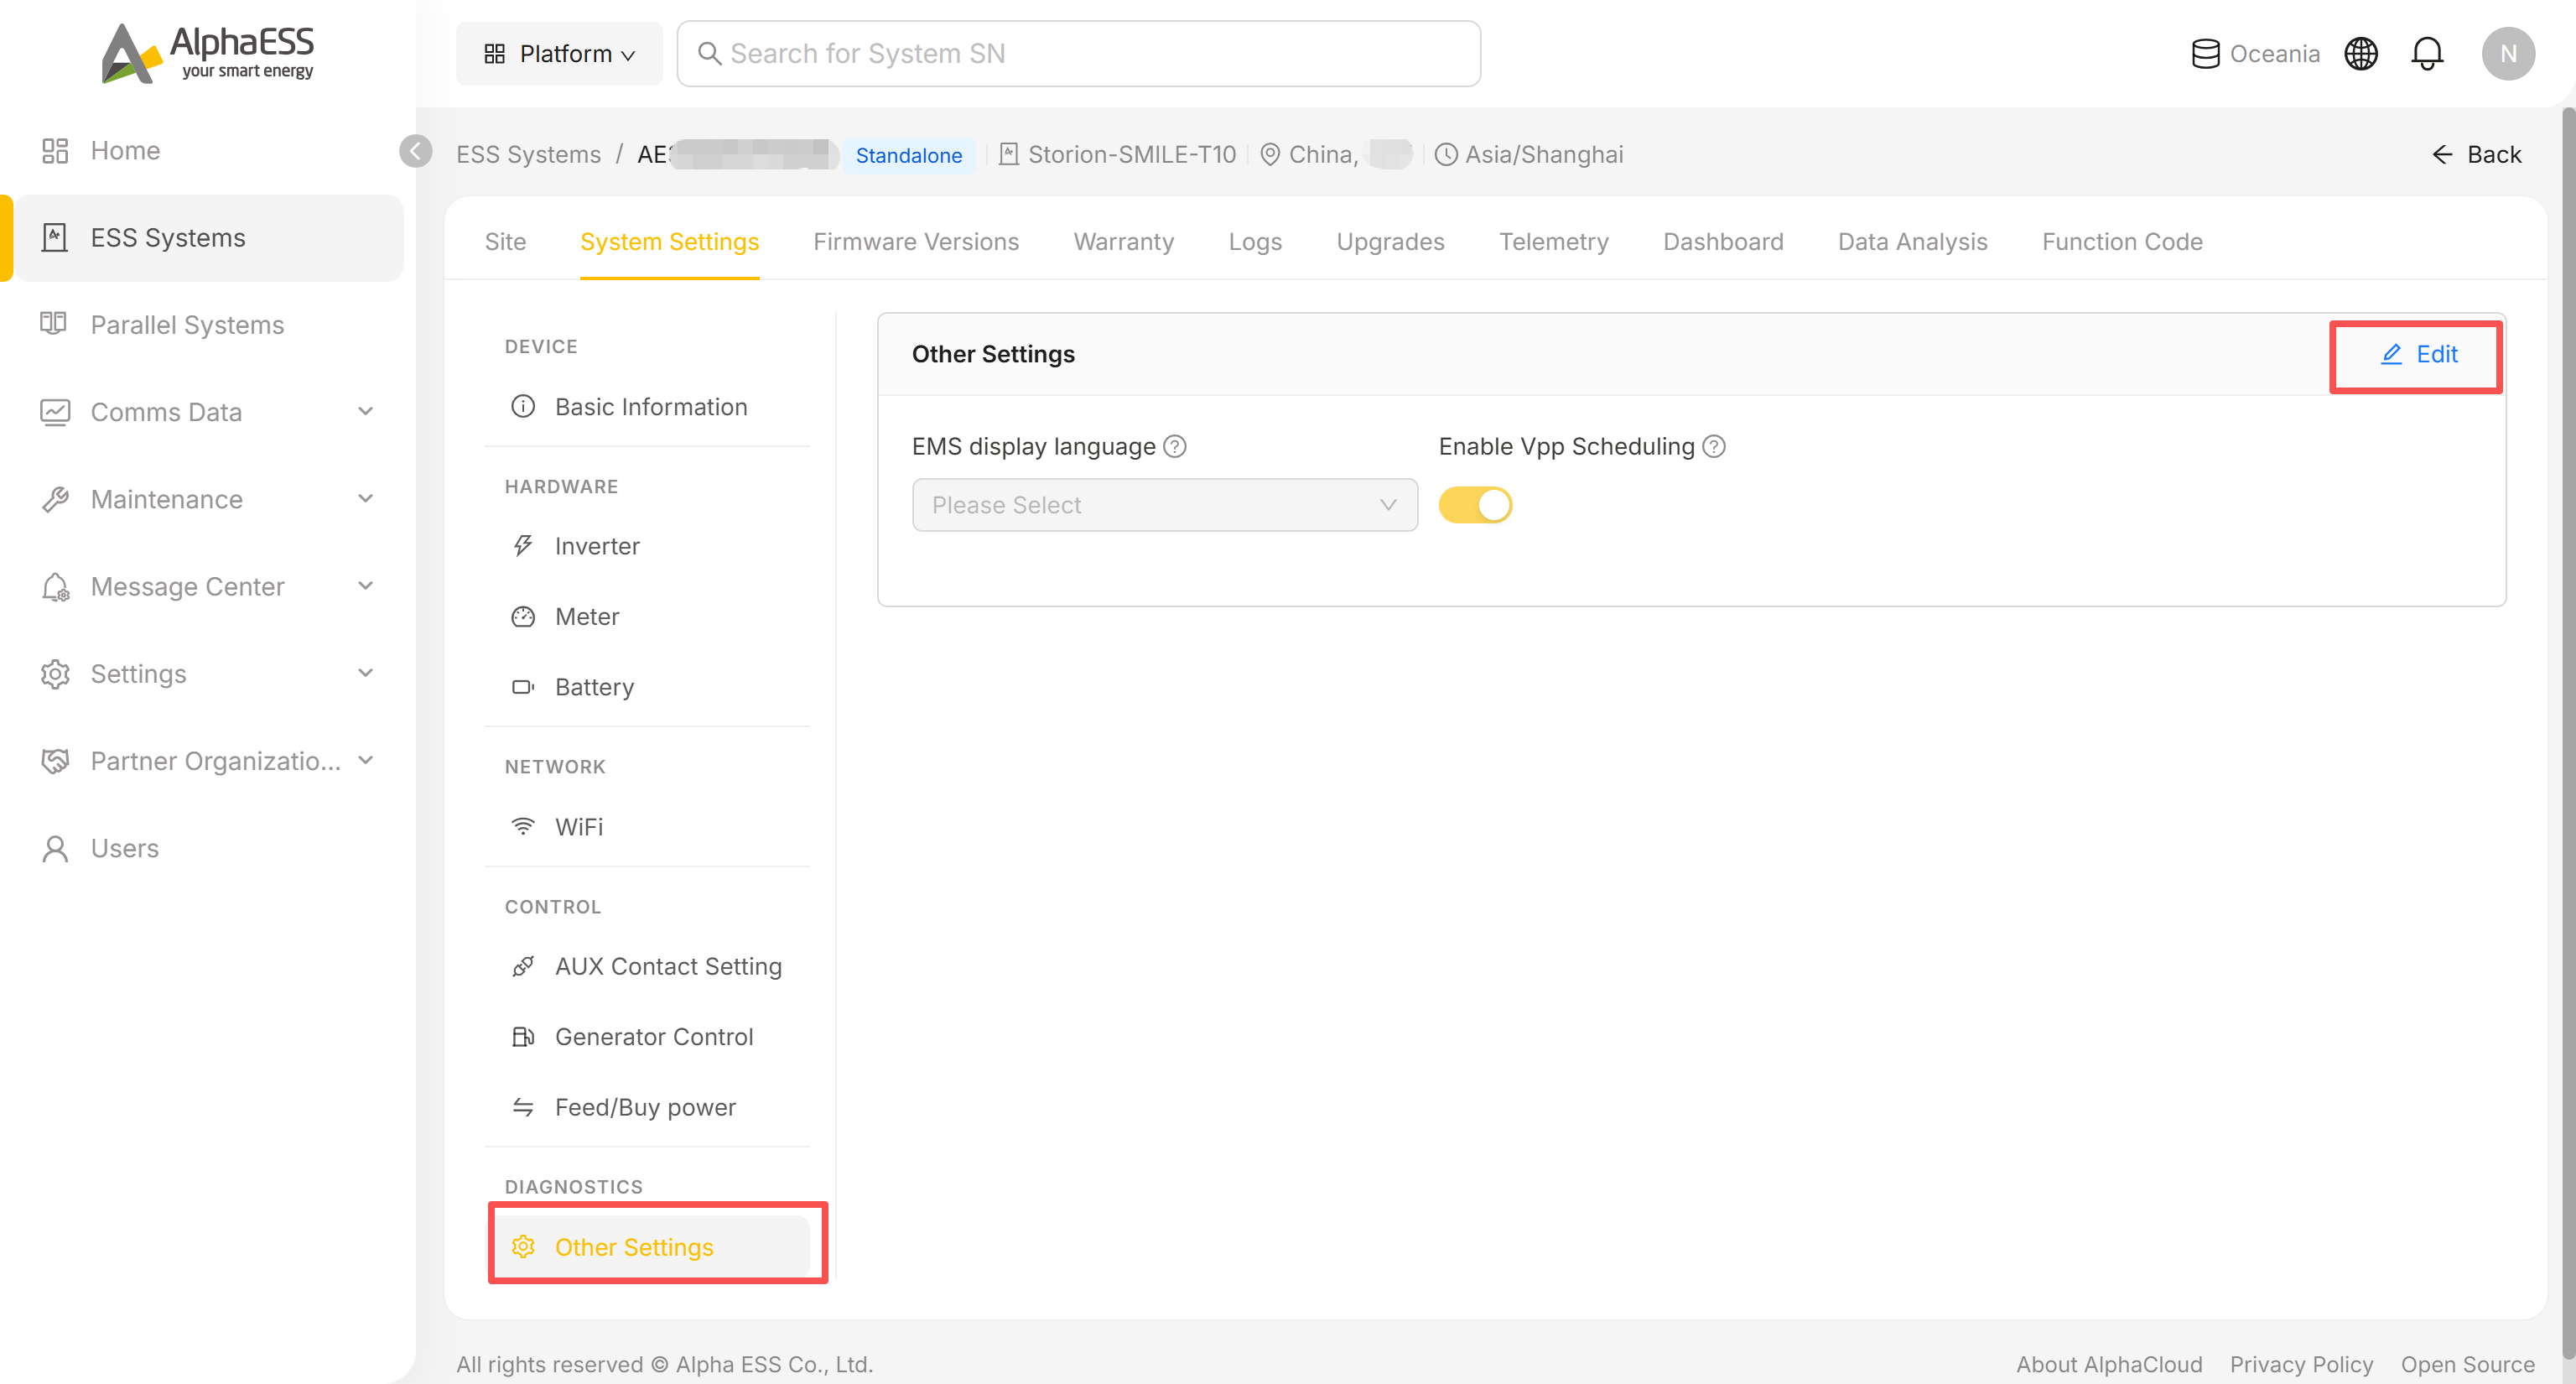
Click Edit to change the EMS display language shown on the device, or toggle Enable Vpp Scheduling for VPP participation, then Save.