Wireless Meter
The SMILE series supports wireless meters (such as the TLMeter-AC6C80). A wireless meter communicates with the system's communication module over Wi-Fi, so no RS485 cabling is required between the meter and the inverter. A single dual-circuit wireless meter can serve both the grid side and the PV side at the same time:
| Measurement circuit | Measured object |
|---|---|
| Line 1 | Grid side (Grid) |
| Line 2 | PV side (PV) |
This article explains how to configure a wireless meter during installation, and how to view and replace it afterwards.
Prerequisites
- The device has been added and is Online (basic information and network configuration completed as part of the standard installation process).
- The wireless meter is installed, powered on, and within Bluetooth range of your phone.
- Bluetooth is enabled on your phone.
Configuring a wireless meter during installation
1. During the installation process, go to Parameter Settings and open the Operating Parameters Configuration page. Complete the safety regulation (Safety), PV installation method (Solar Installation, coupling type) and power-related settings as usual.
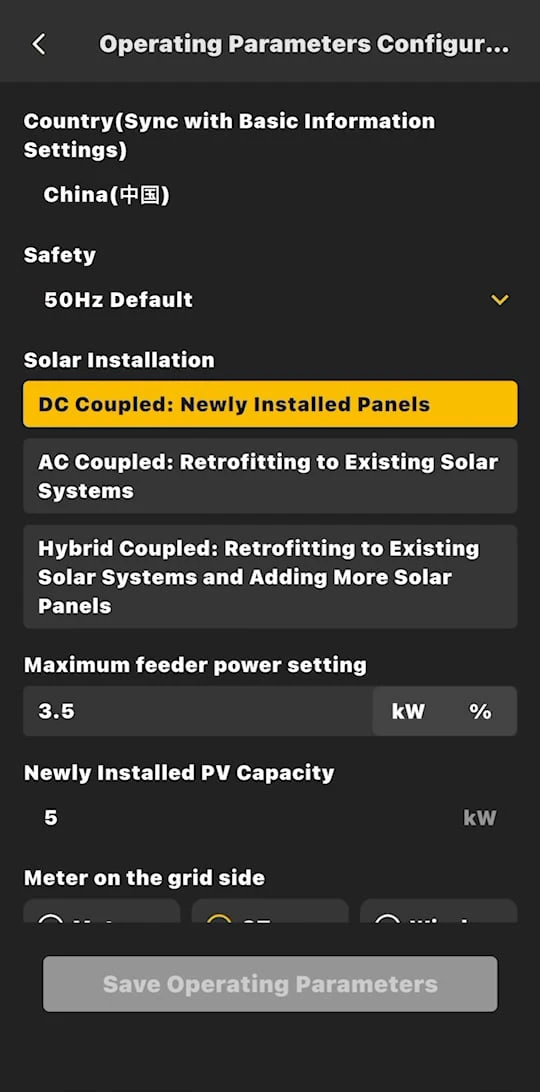
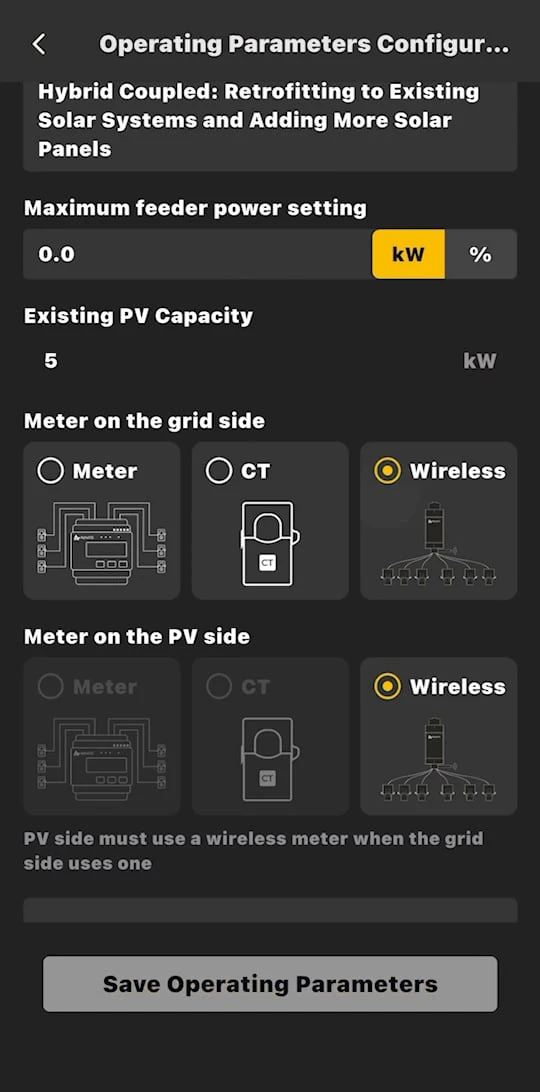
2. Under Meter on the grid side, select Wireless. The PV-side meter is automatically set to Wireless as well, and its wired Meter and CT options are greyed out. A mixed configuration with one side wireless and the other side wired (Meter/CT) is not supported.
PV side must use a wireless meter when the grid side uses one.
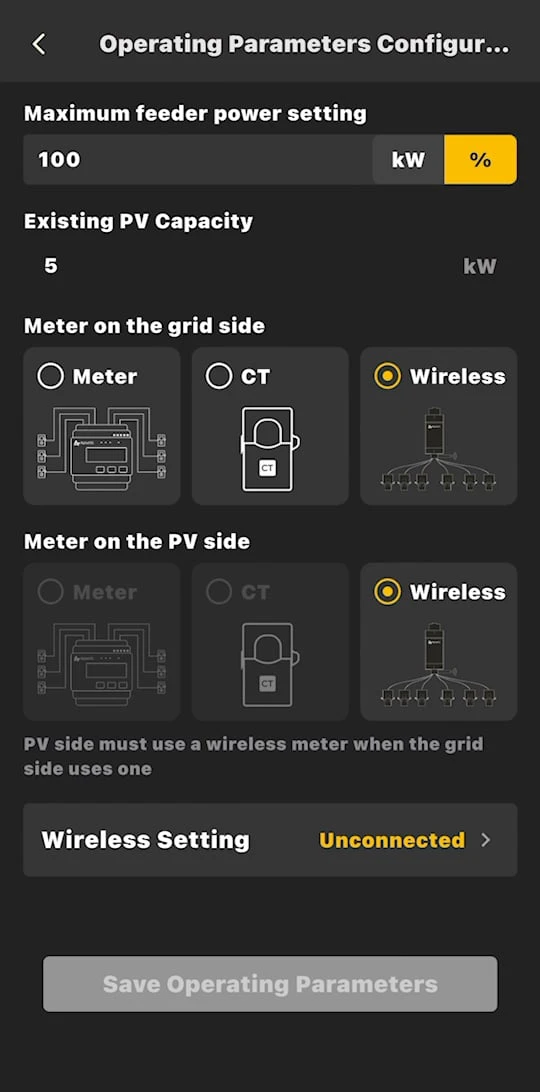
3. A Wireless Setting entry appears below the meter selection area, showing the status Unconnected. Tap it to start pairing.
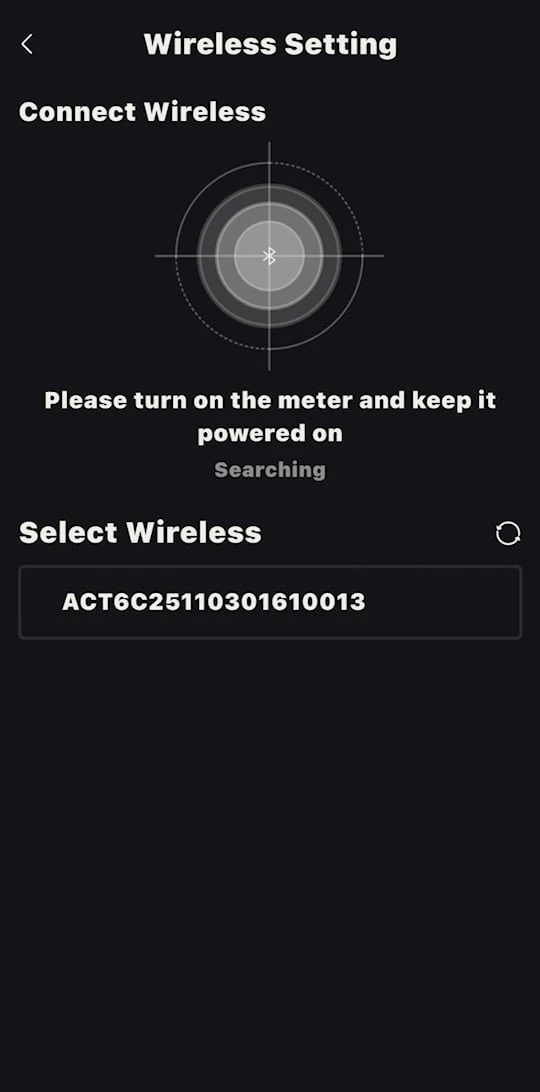
4. On the Wireless Setting page, keep the meter powered on. The app searches for nearby wireless meters over Bluetooth and lists the results under Select Wireless. Tap the serial number (SN) that matches the meter you have installed.
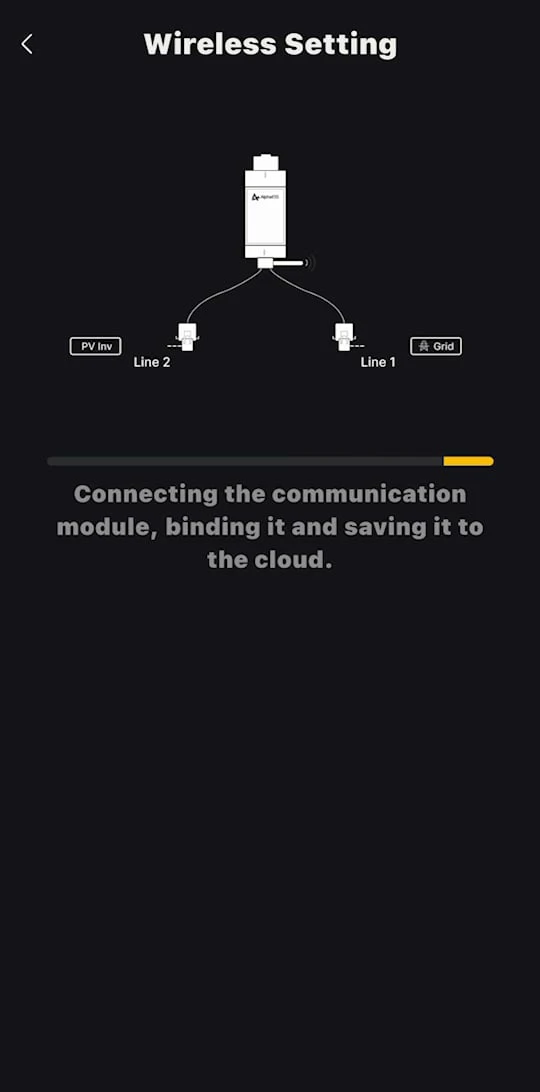
5. The app connects the meter to the communication module, completes the binding and saves the binding relationship to the cloud. The diagram shows the measurement circuit assignment: Line 1 → Grid, Line 2 → PV Inv.
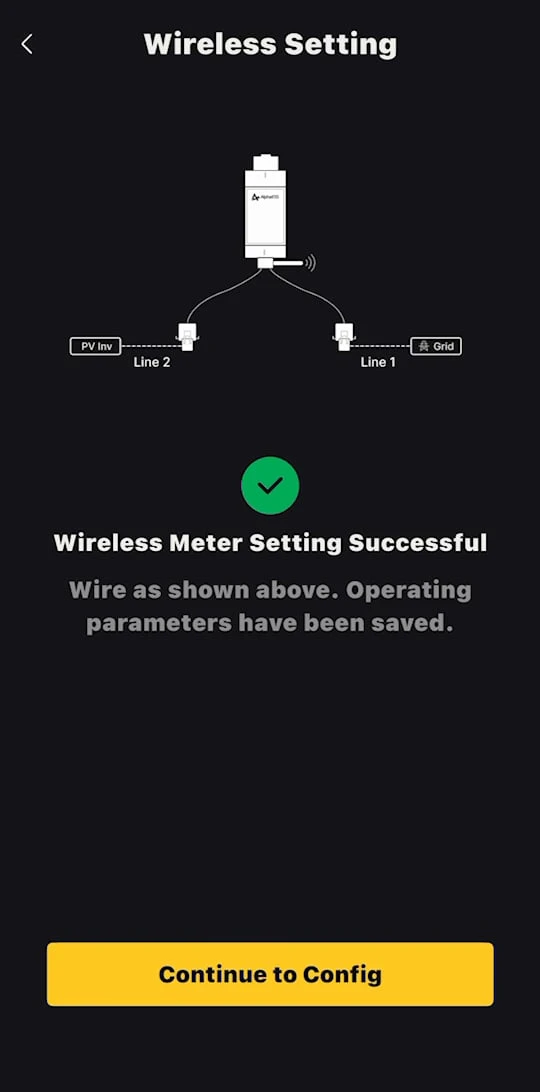
6. Once finished, Wireless Meter Setting Successful is displayed. Wire the measurement circuits as shown in the diagram; the operating parameters have been saved automatically. Tap Continue to Config to return.
7. Back on the Operating Parameters Configuration page, the Wireless Setting card shows Connected, together with the meter SN and the circuit assignment (Line On Grid Side: Line 1, Line On PV Side: Line 2). Tap Save Operating Parameters to complete the configuration.
The configuration parameters will be locked upon submission and cannot be modified.
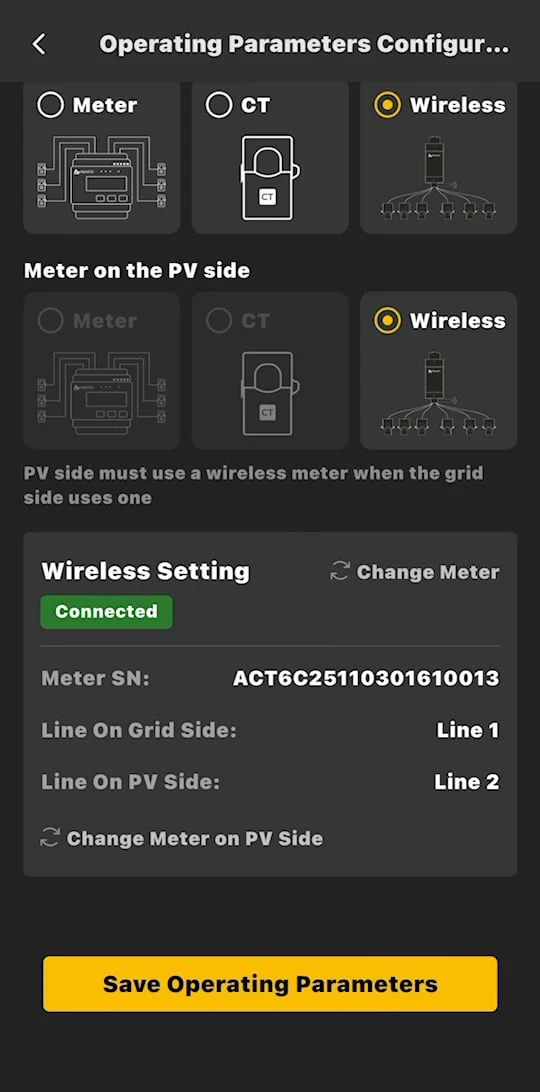
By default, a single wireless meter serves both sides. If a separate wireless meter is required on the PV side, tap Change Meter on PV Side on the Wireless Setting card to pair a second meter; its Line 2 will then be used for the PV side.
Viewing and managing wireless meters
Meter Information
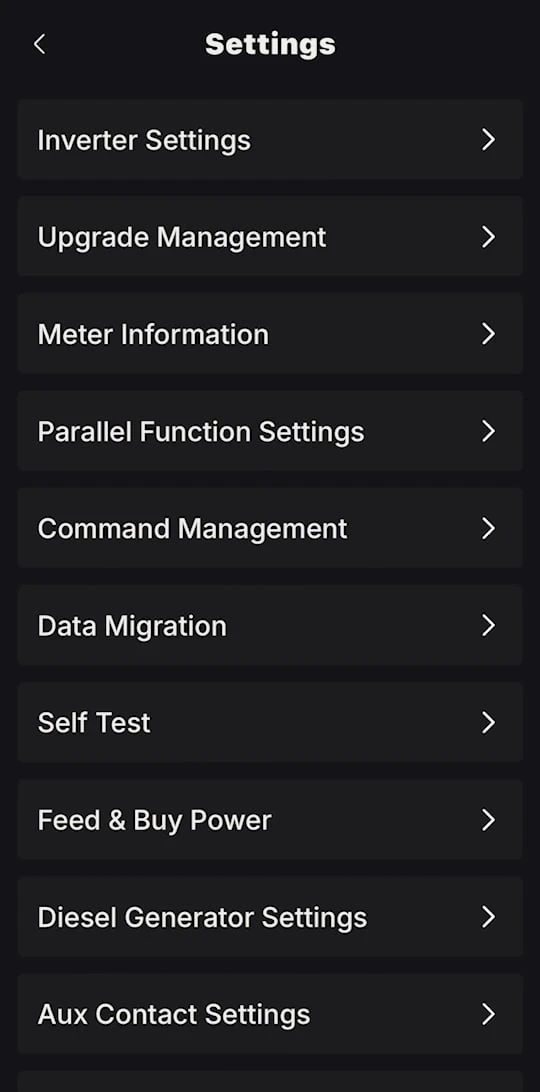
1. On the device page, go to Settings → Meter Information.
2. The page is divided into two sections: Grid Side Meter and PV Side Meter. For a wireless meter, each section shows:
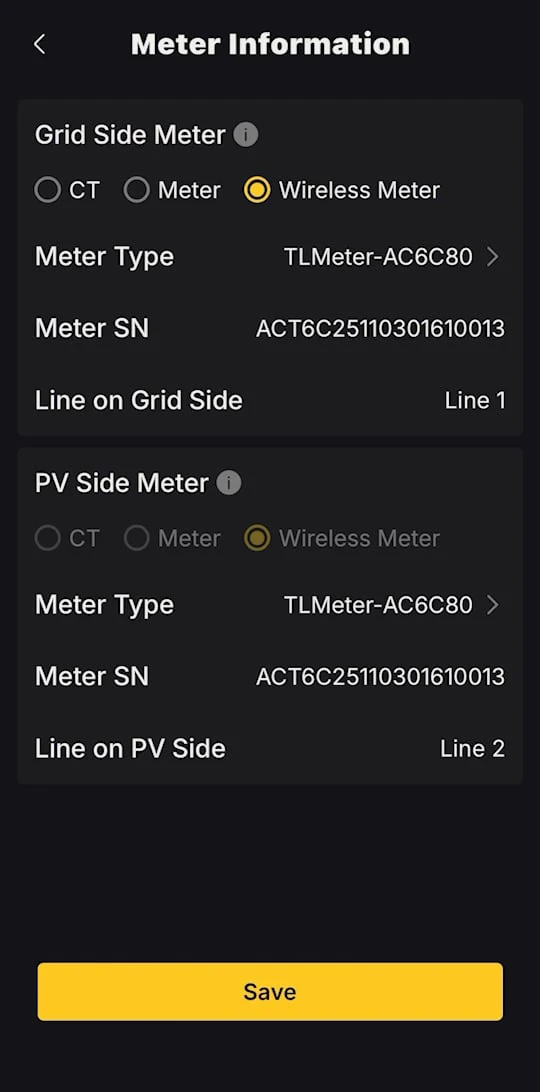
| Field | Description |
|---|---|
| Meter Type | Wireless meter model, e.g. TLMeter-AC6C80 |
| Meter SN | Serial number of the bound meter |
| Line on Grid Side / Line on PV Side | The measurement circuit used on that side (Line 1 / Line 2) |
Meter Detail
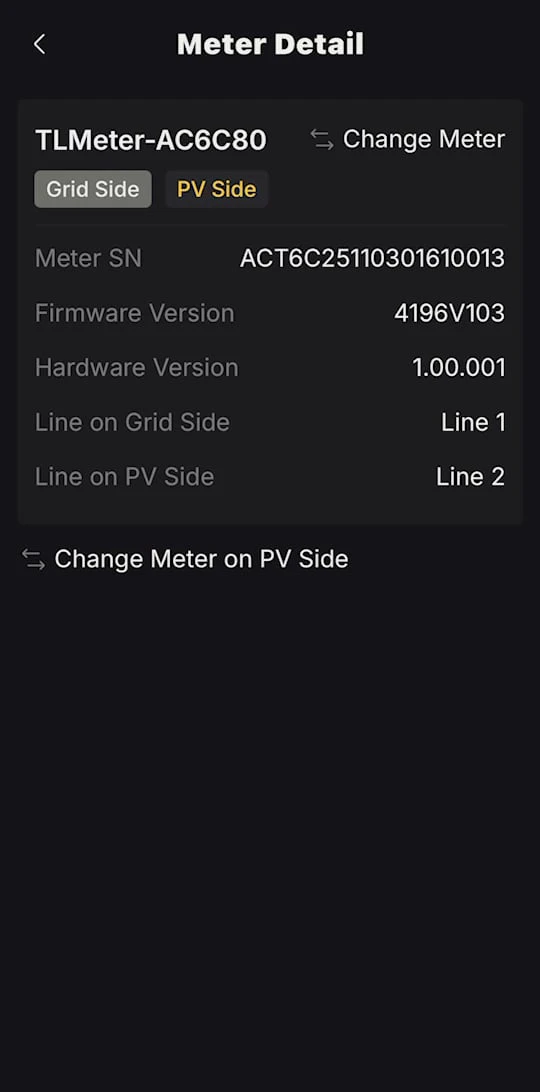
Tap the Meter Type row to open Meter Detail. The Grid Side / PV Side label indicates which side the meter serves; the page also shows the meter's Firmware Version and Hardware Version.
Replacing a meter
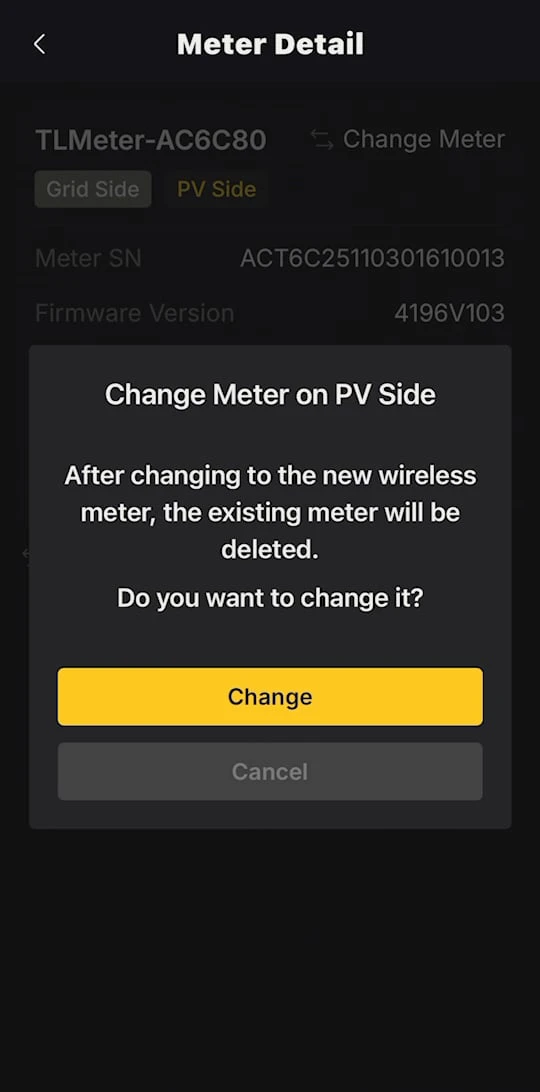
The Meter Detail page offers two replacement options (also available on the Wireless Setting card during installation):
- Change Meter — replace the whole unit with a new wireless meter.
- Change Meter on PV Side — pair a separate wireless meter for the PV side only, keeping the current meter on the grid side.
Both options require confirmation:
After changing to the new wireless meter, the existing meter will be deleted. Do you want to change it?
Tap Change to search for and select a new meter, or tap Cancel to keep the current one.